


This article will delve into the significance of NER (Named Entity Recognition) detection in OCR (Optical Character Recognition) and showcase its application through the John Snow Labs NLP library with visual features installed. Furthermore, we will examine the efficiency of John Snow Lab’s One Liner Call in simplifying the NER-based extraction process.
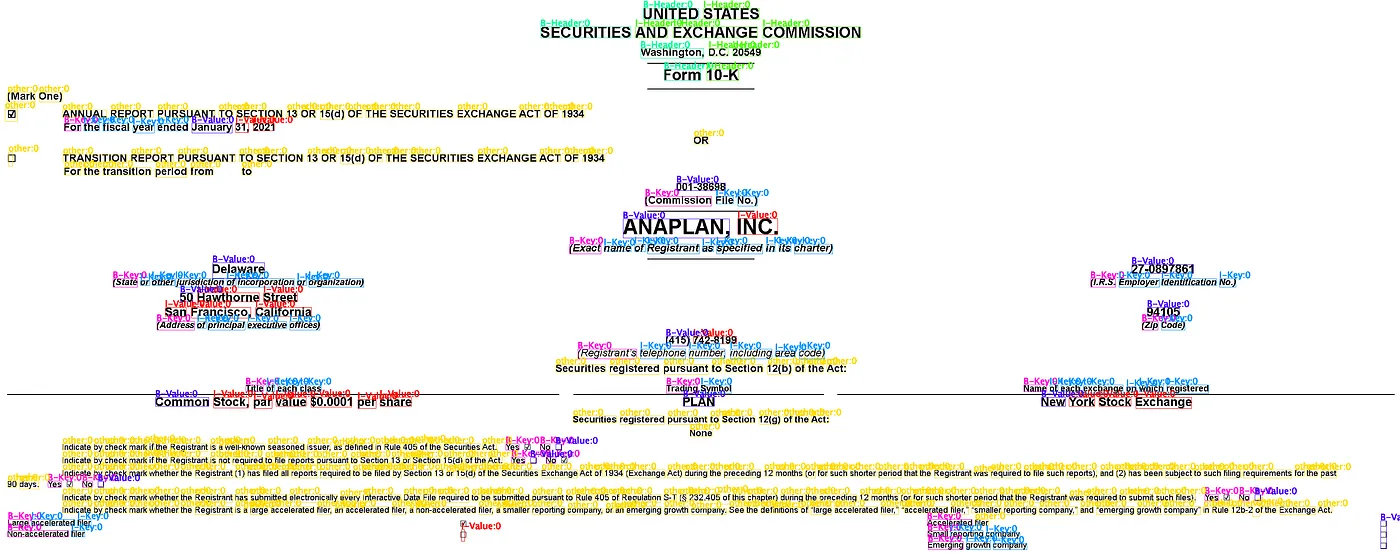
Image results of NER detection using Visual NLP
Introduction: What makes Named Entity Recognition crucial in comprehending documents?
Named Entity Recognition (NER) is a pivotal tool in understanding documents because it identifies and categorizes specific entities mentioned within the text. These entities can include people’s names, organizations, locations, dates, and more. By automatically extracting and classifying these entities, NER helps extract meaningful information from text, enabling better comprehension and analysis of documents. It streamlines tasks such as information retrieval, summarization, and knowledge extraction, enhancing the efficiency of various natural language processing applications.
How does Visual NLP come into action?
Visual NLP’s VisualDocumentNer class now enables you to extract entities from images as a Pandas data frame by building a pipeline or simply in just a single line of code.
What are the components that will be used for NER in Visual NLP?
VisualDocumentNer
VisualDocumentNER serves as the gateway to transformer-based models for document NER. It can detect keys and values, like in the FUNSD dataset, representing a form’s structure. These are typically linked using a FormRelationExtractor model. Some VisualDocumentNER models are trained to consider entities individually, without a post-processing stage. Examples of such entities include names, places, or medications. The goal here is not to link entities but to use them individually. VisualDocumentNER, like VisualDocumentClassifier, receives ‘visual tokens’ — tokens with HOCR format coordinates — and images to inform the model.
Implementation: How do we use Visual NLP for NER?
from johnsnowlabs import nlp, visual

# Create an instance of BinaryToImage, set 'content' as input and 'image' as output
binToImage = visual.BinaryToImage() \
    .setInputCol("content") \
    .setOutputCol("image")

# Convert the image to HOCR format, set 'image' as input and 'hocr' as output
ocr = visual.ImageToHocr()\
    .setInputCol("image")\
    .setOutputCol("hocr")\
    .setIgnoreResolution(False)\
    .setOcrParams(["preserve_interword_spaces=0"])

# Tokenize the HOCR data, set 'hocr' as input and 'token' as output
tokenizer = visual.HocrTokenizer()\
    .setInputCol("hocr")\
    .setOutputCol("token")

# Apply Named Entity Recognition (NER) on the tokenized data, set 'token' and 'image' as input and 'entities' as output
ner = visual.VisualDocumentNer()\
    .pretrained("lilt_roberta_funsd_v1", "en", "clinical/ocr")\
    .setInputCols(["token", "image"])\
    .setOutputCol("entities")

# Draw annotations on the image based on the recognized entities, set 'image' and 'entities' as input and 'image_with_annotations' as output
draw = visual.ImageDrawAnnotations() \
    .setInputCol("image") \
    .setInputChunksCol("entities") \
    .setOutputCol("image_with_annotations") \
    .setFontSize(10) \
    .setLineWidth(4)

# Create a pipeline model with the defined stages
pipeline = visual.PipelineModel(stages=[
    binToImage,
    ocr,
    tokenizer,
    ner,
    draw
    ])
Confused?
Don’t worry. Let me explain what is happening in the pipeline.
Let us break it down:
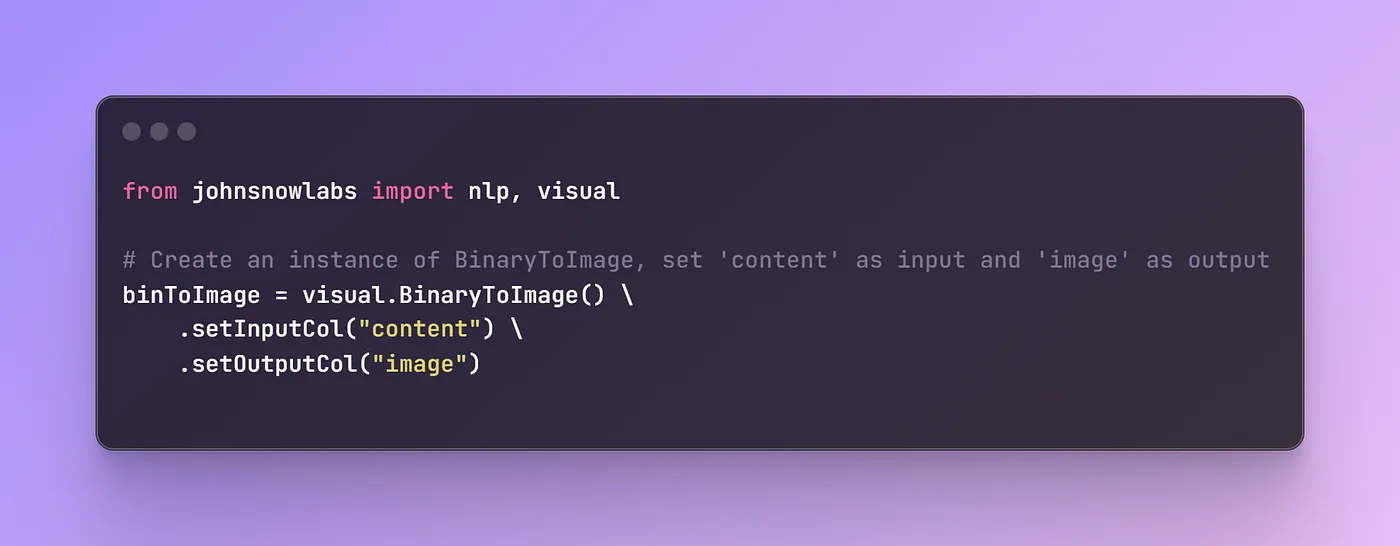
The binToImage object is created to convert binary data into an image format and configures the output column as “image” with a specified image type.
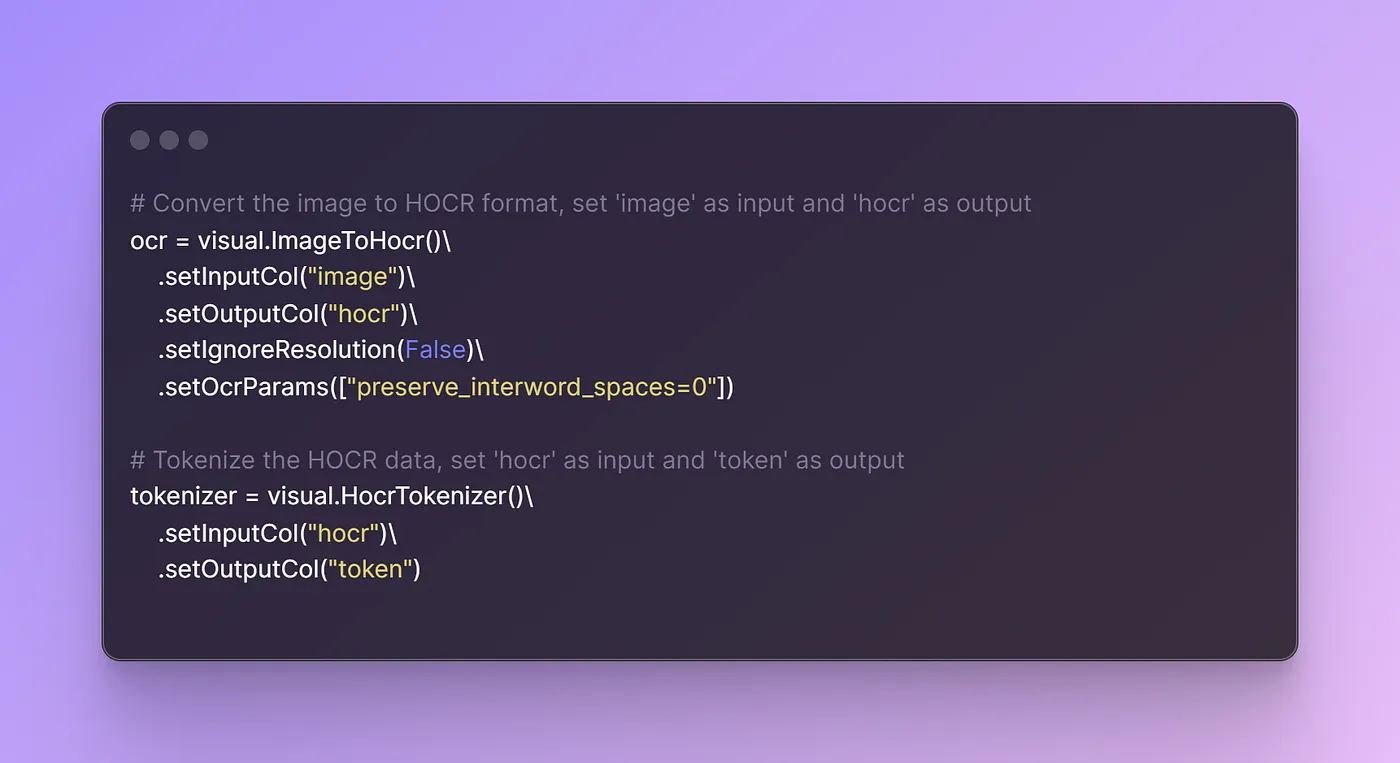
Firstly, an OCR component (visual.ImageToHocr()) is initialized, which takes images as input and converts them into HOCR format, a structured way of representing OCR output. This step ensures that the text content within the images can be properly recognized and processed.
Next, a tokenizer component (visual.HocrTokenizer()) is initialized, which takes the HOCR text as input and tokenizes it into individual units, typically words or subwords. This step prepares the text for further analysis and understanding.
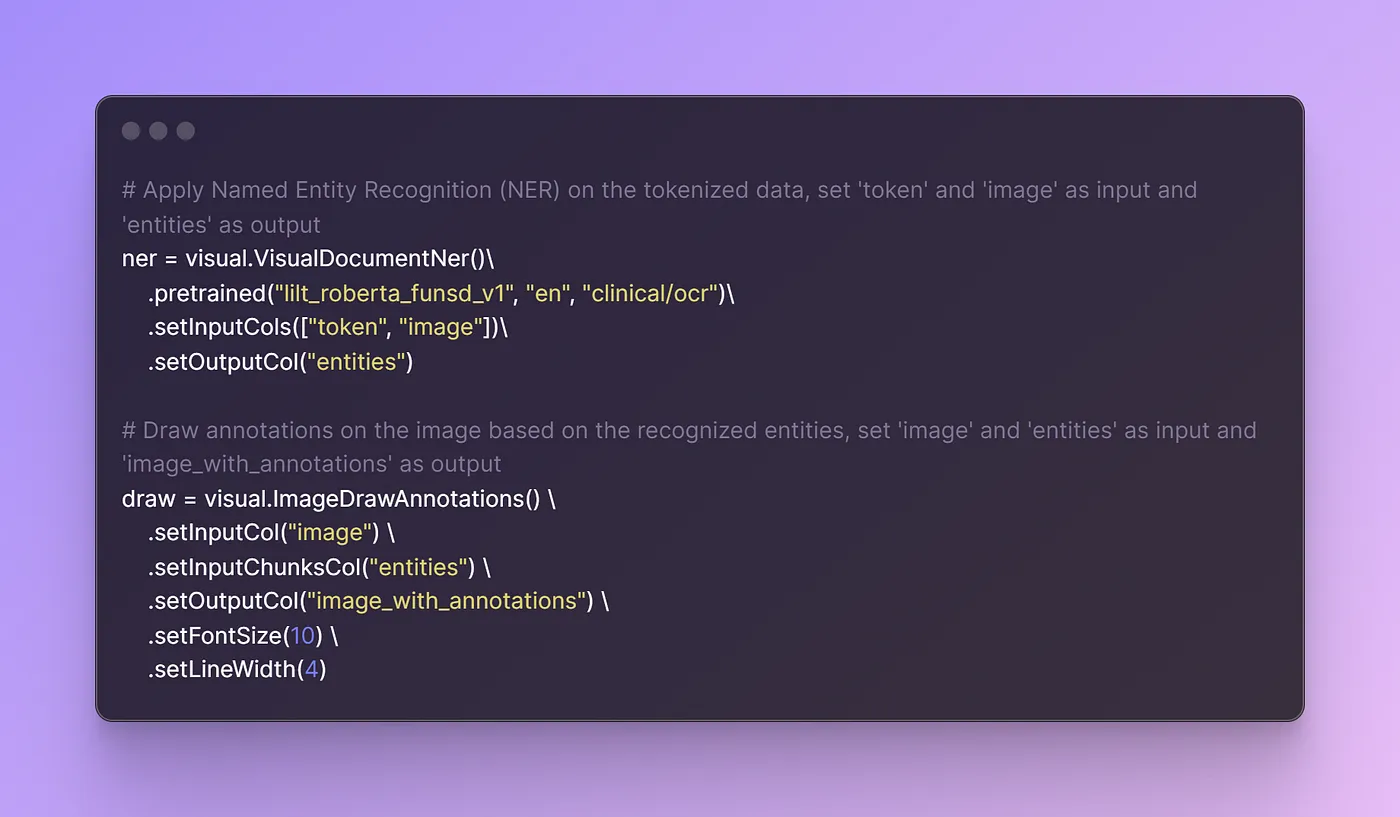
Then, a Named Entity Recognition (NER) component (visual.VisualDocumentNer()) is set up. It utilizes a pretrained model specialized in recognizing named entities within text derived from visual documents. By providing the tokenized text and the image data as input, this component identifies and categorizes entities like names, organizations, and locations within the text.
The draw component is responsible for annotating the original images based on the recognized entities. It takes the original images and the identified entities as input and generates annotated images where the recognized entities are visually highlighted.
Finally, these steps are arranged into a pipeline using PipelineModel, transforming the input DataFrame to yield charming results.
We get the following output:
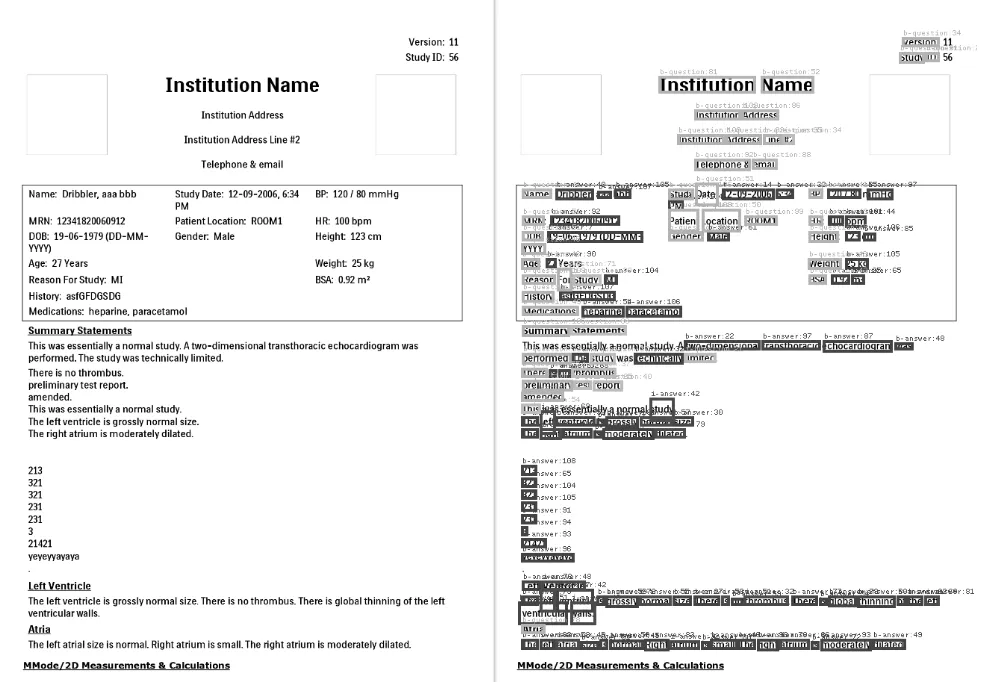
Original image vs Predicted image
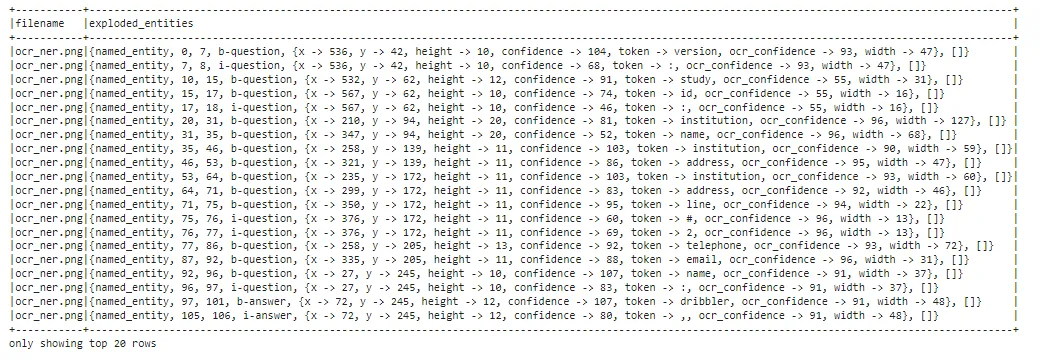
Entities detected
Voila! We have just mastered NER using John Snow Labs with Visual features installed. It’s all about constructing a pipeline and stacking one component on top of another.
Let’s delve into what sets John Snow Labs apart in the second part!
Summary
In this blog post, we’ve embarked on an in-depth exploration of constructing a pipeline for NER utilizing John Snow Labs with visual features installed. We’ve observed the potency of the tools offered by John Snow Labs, which streamline this process and empower us to execute intricate tasks. In our subsequent post, we’ll demonstrate how all of these operations can be accomplished with a mere single line of code, thanks to John Snow Labs. Stay tuned!