


The NLP Server is a turnkey solution for applying John Snow Labs NLP & OCR on your documents without writing a line of code. It is a FREE and easy-to-use tool, running NLU under the hood to mediate access to over 4500 pre-trained Spark NLP and Spark OCR models and pipelines. You can run the NLP Server on your own infrastructure, and test the models on your own data with zero data sharing.
The NLP Server offers:
- a very intuitive user interface to quickly see the results pre-trained models predict on your text and image documents;
- an API endpoint that can be used to call the NLP pipelines from your existing applications and systems and analyze data at scale.
Access to 4,500+ pretrained NLP and OCR models and pipelines
More than 4,500 pre-trained models and pipelines currently published on the NLP Models Hub are available out-of-the-box via the NLP Server. They are divided as follows:
- public – all Spark NLP models and pipelines are included in this category. The public spells are available to all users.
- licensed– Spark NLP for Healthcare and Spark OCR spells are only available when a valid license key is loaded into the NLP Server or imported from
- custom – custom models trained via the Annotation Lab or trained by the user and uploaded to the NLP Server.
Installing the NLP Server
For deploying NLP Server on your environment, make sure you have Docker up and running on your machine and simply run the below one-liner.
docker run –pull=always -p 5000:5000 johnsnowlabs/nlp-server:latest
This will download and run the latest NLP Server docker image. The NLP Server will be available via your browser, at the following URL: http://localhost:5000/
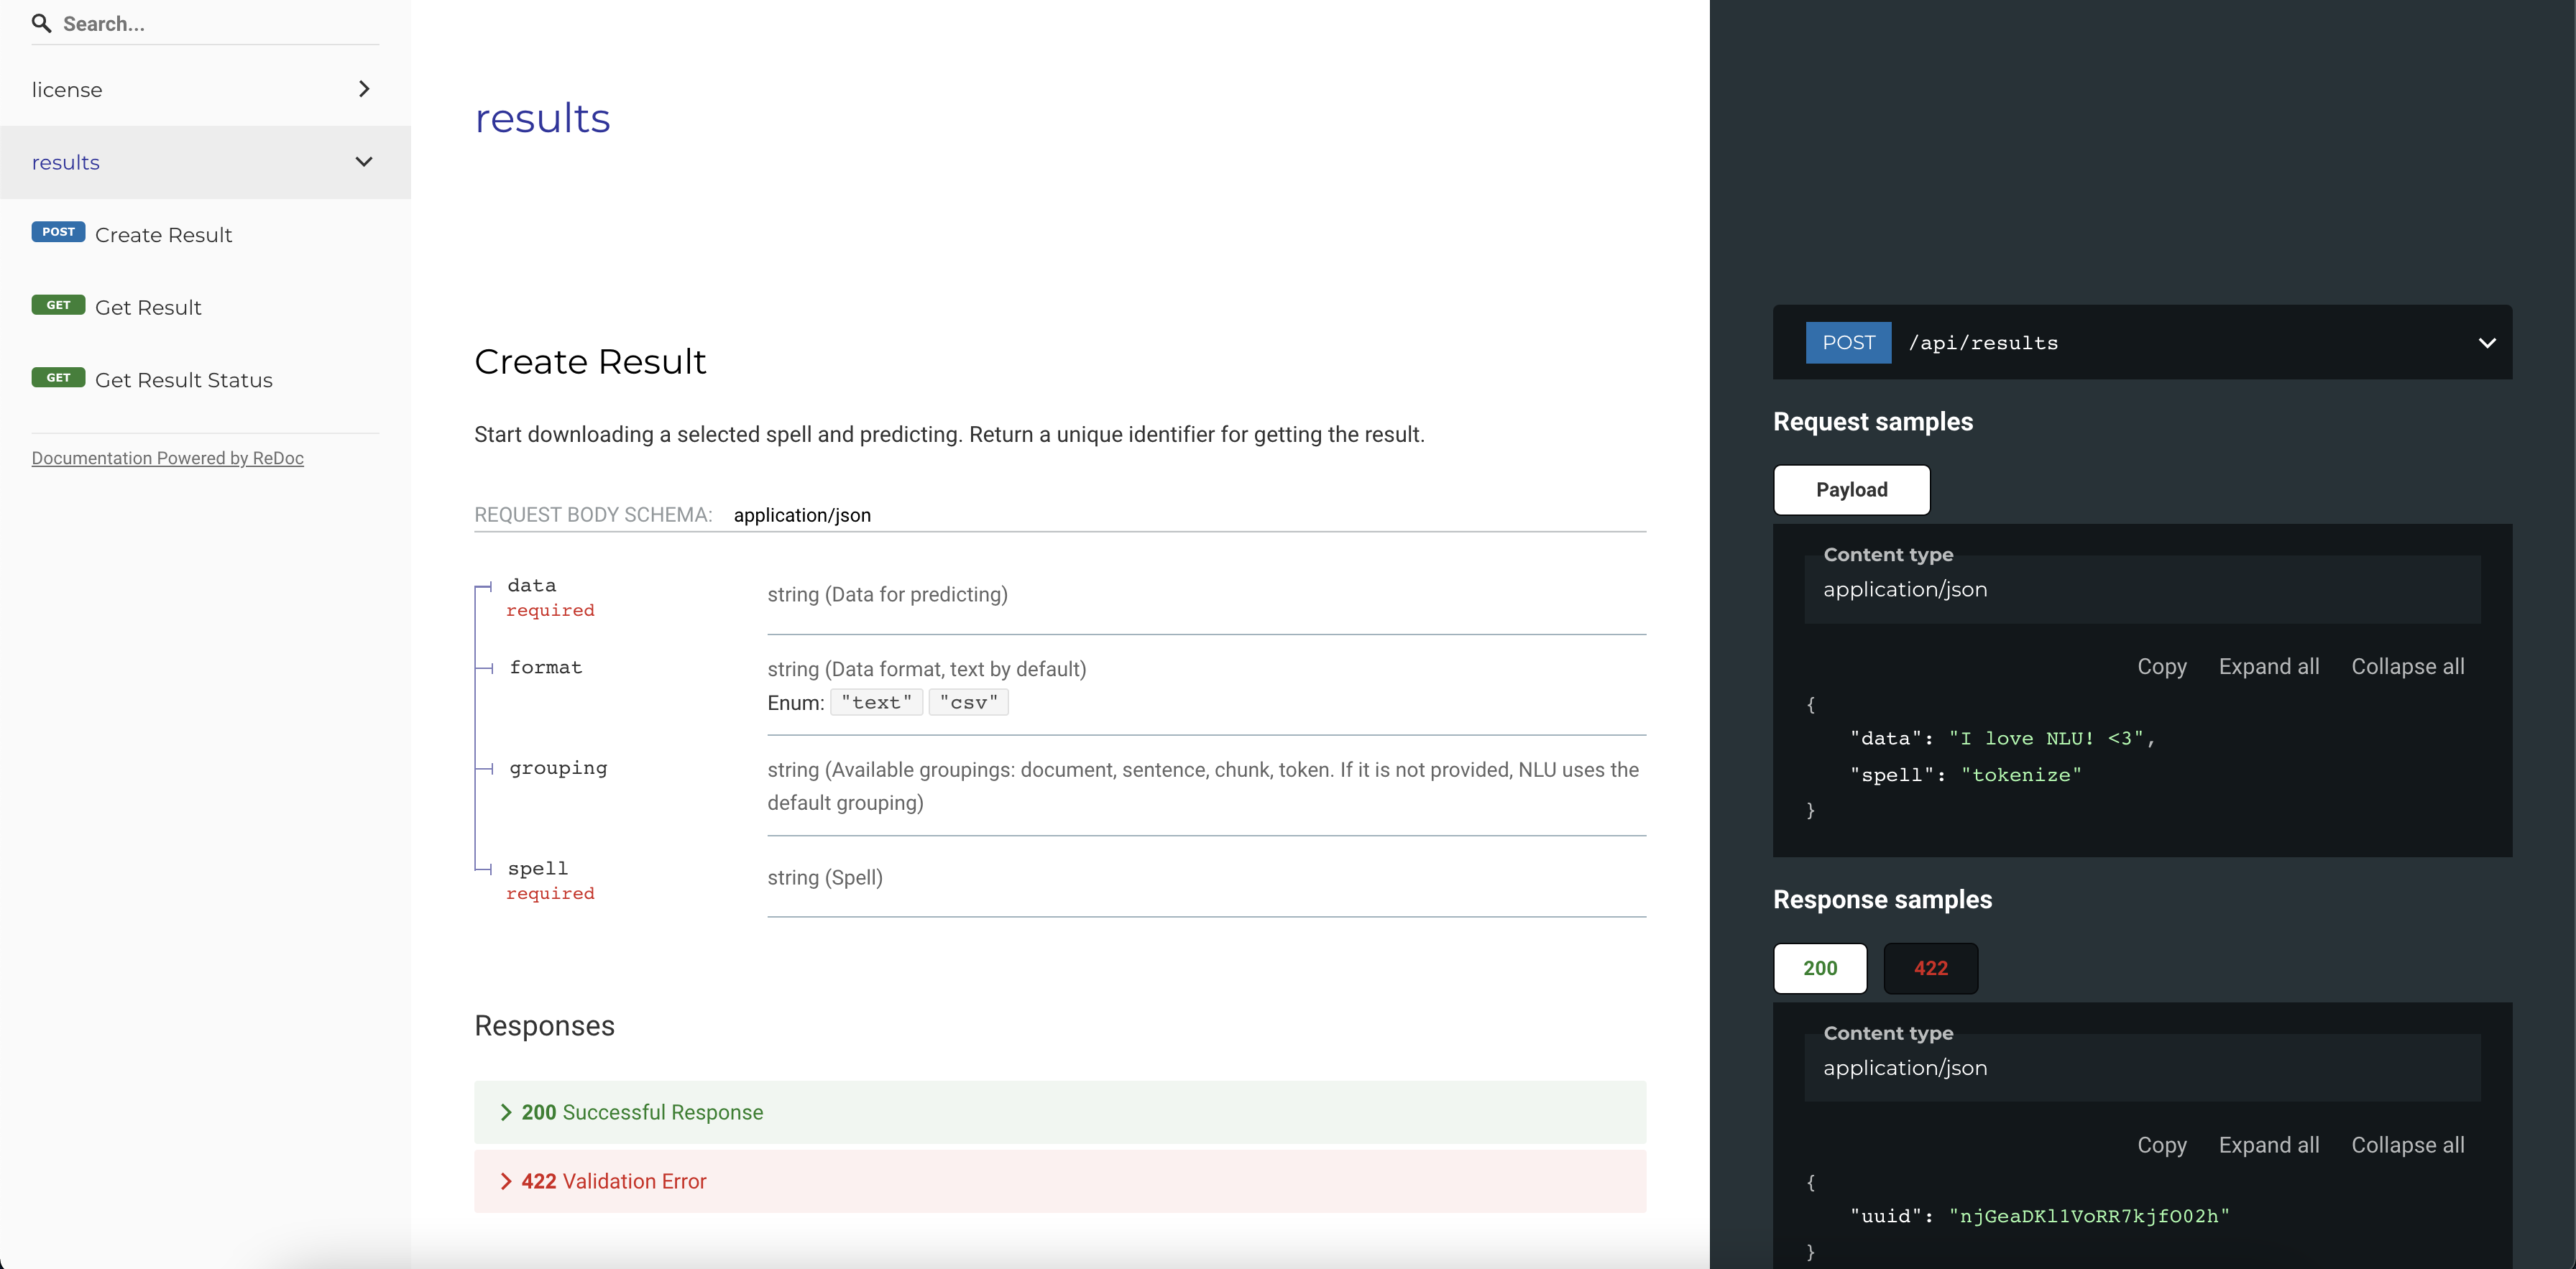
NLP Server also includes a REST API which can be used to process any amount of data using NLU. Once you deploy the NLP Server, you can access the API documentation at the following URL http://localhost:5000/docs.
Getting Started
The NLP Server comes with a set of popular spells readily available. Users can right away test those on sample data also included in the NLP Server. By clicking on the Try Popular Spells links, you can start experimenting.

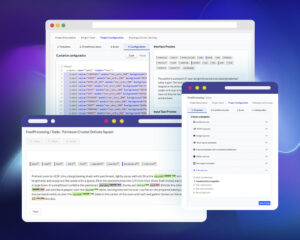
When users click on one popular spell, all fields are automatically filled and you can easily see the results predicted by the spell on top of the test data.
The easy user interface for NLP
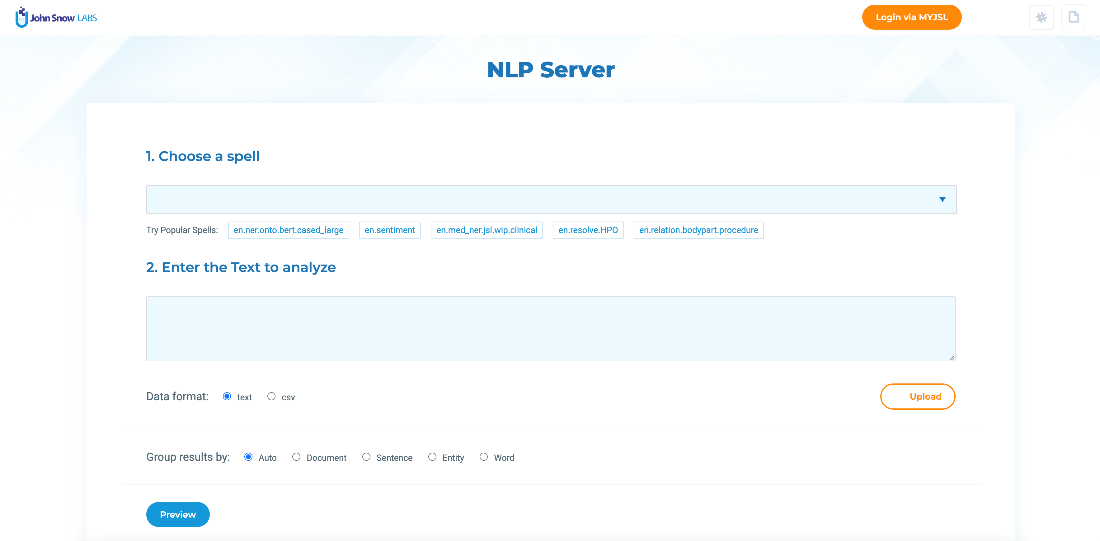
No programming or data science skills are necessary to interact with the NLP Server. Users do not need extended knowledge of Machine Learning, Deep Learning, Apache Spark, Big Data, or similar skills to be able to load and analyze their documents with NLP Server. A simple UI is available that guides users through a couple of simple steps:
- Choose a spell to run on the data
- Upload the data
- Preview the results
- Download the results
The selected spell is downloaded automatically if not already available and your data is sent to the NLU backend for analysis. As soon as the results are ready, a preview will be shown on the screen in both annotated text style and data frame format. The entire data frame will also be available for download.
Let’s see the above 4 steps in more detail!
1. Choose a spell
A search feature attached to the spell box allows the easy discovery of the spells to use from the list of 4500+ available spells. A spell corresponds to a pretrained model or pipeline with default options prefilled in.
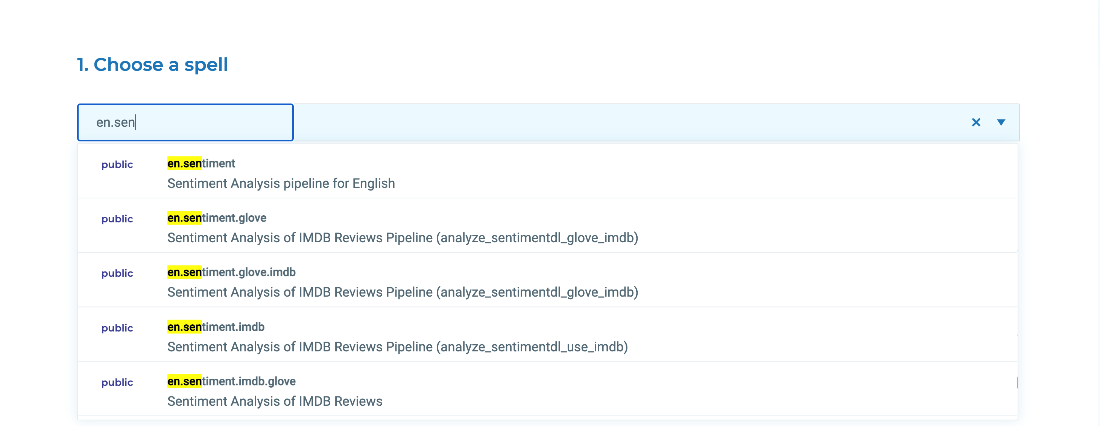
Multiple spells can be selected and chained in a sequence

Once a spell is selected, a link to the documentation of the related model/pipeline appears below the spell box. By clicking on the spell title, users can navigate to the corresponding page on the NLP Models Hub, where additional information about the model and its usage are provided.

2. Upload the data
Two options are available for uploading the data to analyze. First, users can copy-paste text into the text area. Second, users can upload one or several files in text or csv format.
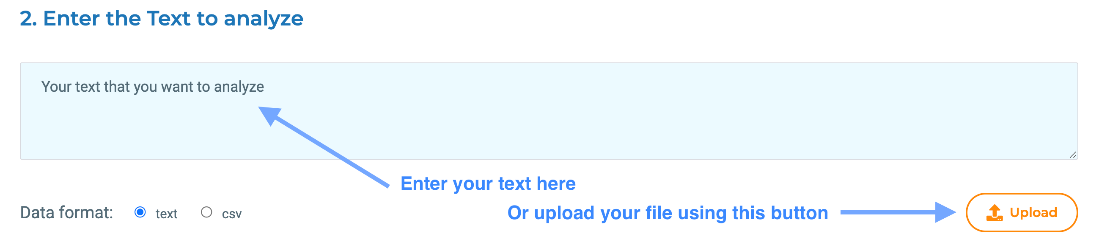
The data format field is automatically checked on file upload but can also be manually changed if necessary.
The data frame results can be grouped according to the chosen options. The Result group parameter determines how the output data is segmented. The analysis is executed on each segment. For example, if you want to run sentiment analysis on a given text, and choose sentence grouping, NLP Server will determine the sentiment that is associated with each sentence. For most use cases the Auto grouping provides good results.
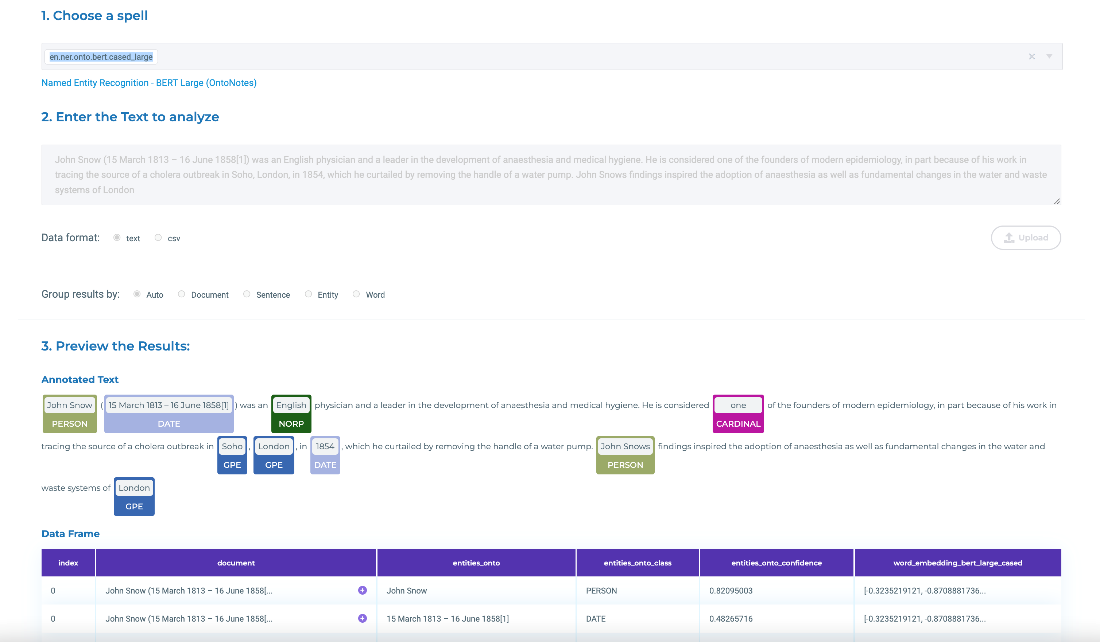
3. Preview the results
When the spell is selected and some data is entered/uploaded, the Preview button becomes available. Click on it to start analyzing your data. The progress of the spell deployment is detailed next to the preview button. It illustrates steps as: the model is being downloaded, loading model from disk to memory, starting up a new session, running the model on the dataset, etc.
After a few seconds, the results will become available.
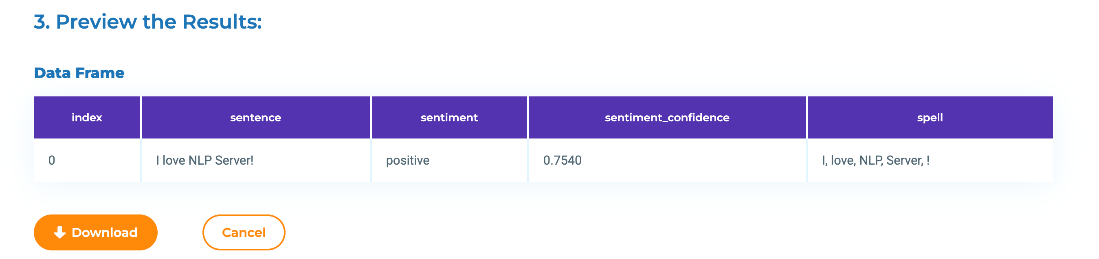
Some spells also display the predictions as annotations on top of the provided text. It is the case of NER, Assertion Status, Relation Extraction or Entity Resolution Spells.
4. Download the results
Finally, you can download the results by clicking on the Download button.
That’s it!
You now know how to install and use the key functionality of the NLP Server. The full power of the NLP Models Hub is at your fingertips.
To learn more or dive into more advanced topics:
- NLP Server Documentation
- to unlock Healthcare NLP and Spark OCR functionality
We’re actively improving the NLP Server so if you have any questions or feedback please reach out at the #nlp-server channel on spark-nlp.slack.com.