


A new generation of the NLP Lab is now available: the Generative AI Lab. Check details here https://www.johnsnowlabs.com/nlp-lab/
To ease and speed up the NLP annotation process for DL model training, John Snow Labs offers a FREE enterprise-grade Annotation Lab. This is a tool for human-in-the-loop annotation for all types of documents (text, image, PDF, video, audio), which supports a wide range of annotation tasks: classification, NER, relation extraction, assertion status detection, and summarization.
This blog post is the second part of a series of posts covering the concrete steps to follow when putting together annotation projects. Here, I illustrate how available resources such as rules and pre-trained models can be reused to speed up the manual data preparation for DL Model training. The use case is that of recipe data analysis for detecting ingredients, quantities or cooking time and temperature.
You can check the first part of this tutorial to learn how to define dictionary and regex-based rules for data preannotation. Once all necessary resources are available you can create your project and start verifying the preannotations as illustrated below.
Project creation
The steps needed for putting together an annotation project are detailed below.
Project Description
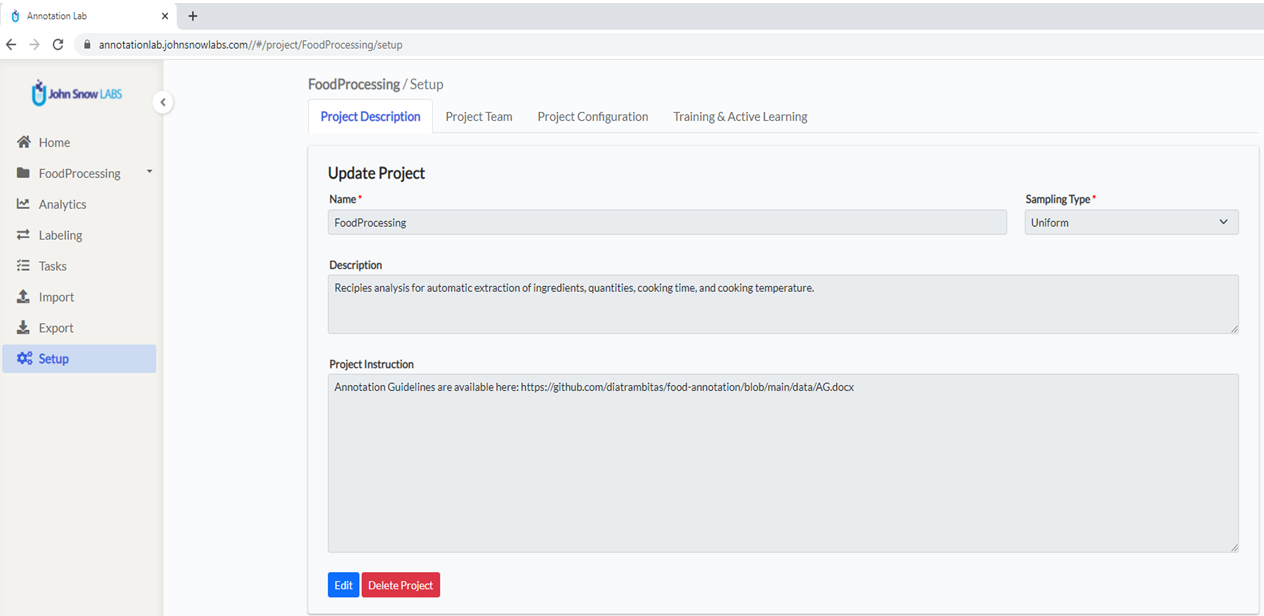
From the main page of the Annotation Lab, click on the Create Project button (upper right side of the screen) and define a name and a short description of the Project as shown in the image below:
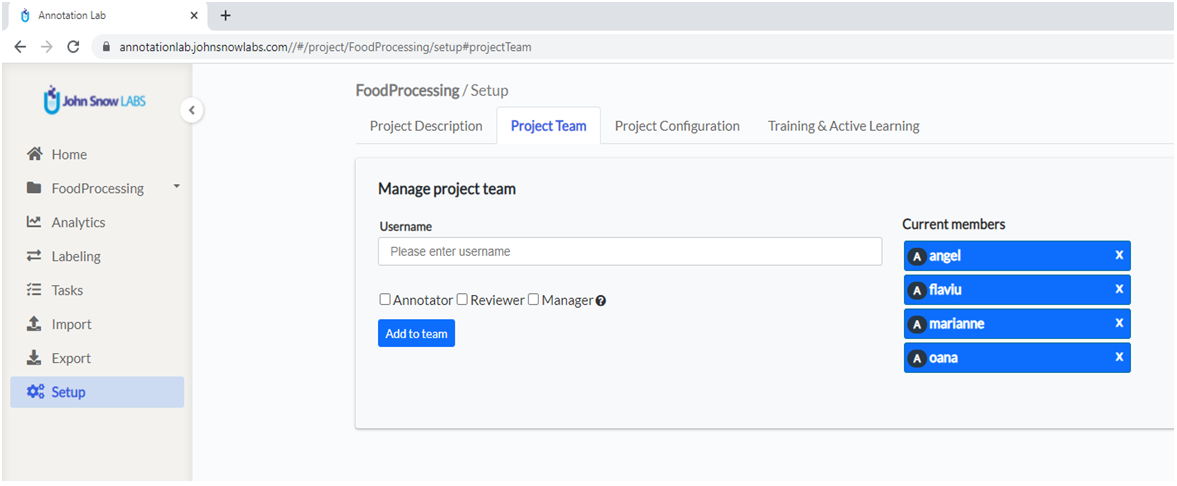
Define the team of annotators
Navigate to the second tab in the Setup screen: Project Team . Here you can define the team you want to work on the project. Start typing the username in the corresponding box and a dropdown with available options will appear. Choose the user you want to add, select the roles you want to assign to the user, and click Add to team.
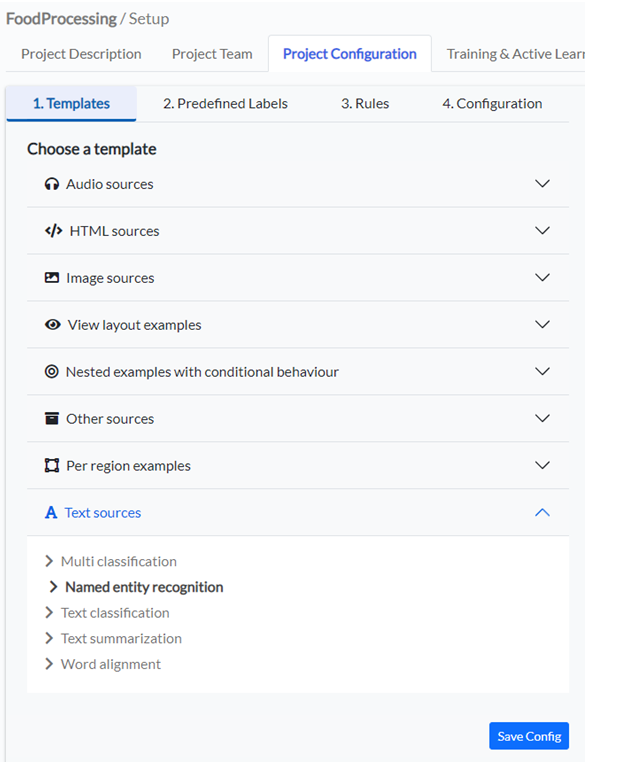
Choose a template for your project
For this tutorial use a text template for Name Entity Recognition. From the Project Configuration tab, go to Templates, and from the Text Sources template choose Named Entity Recognition. This will populate your project configuration with some default Labels.
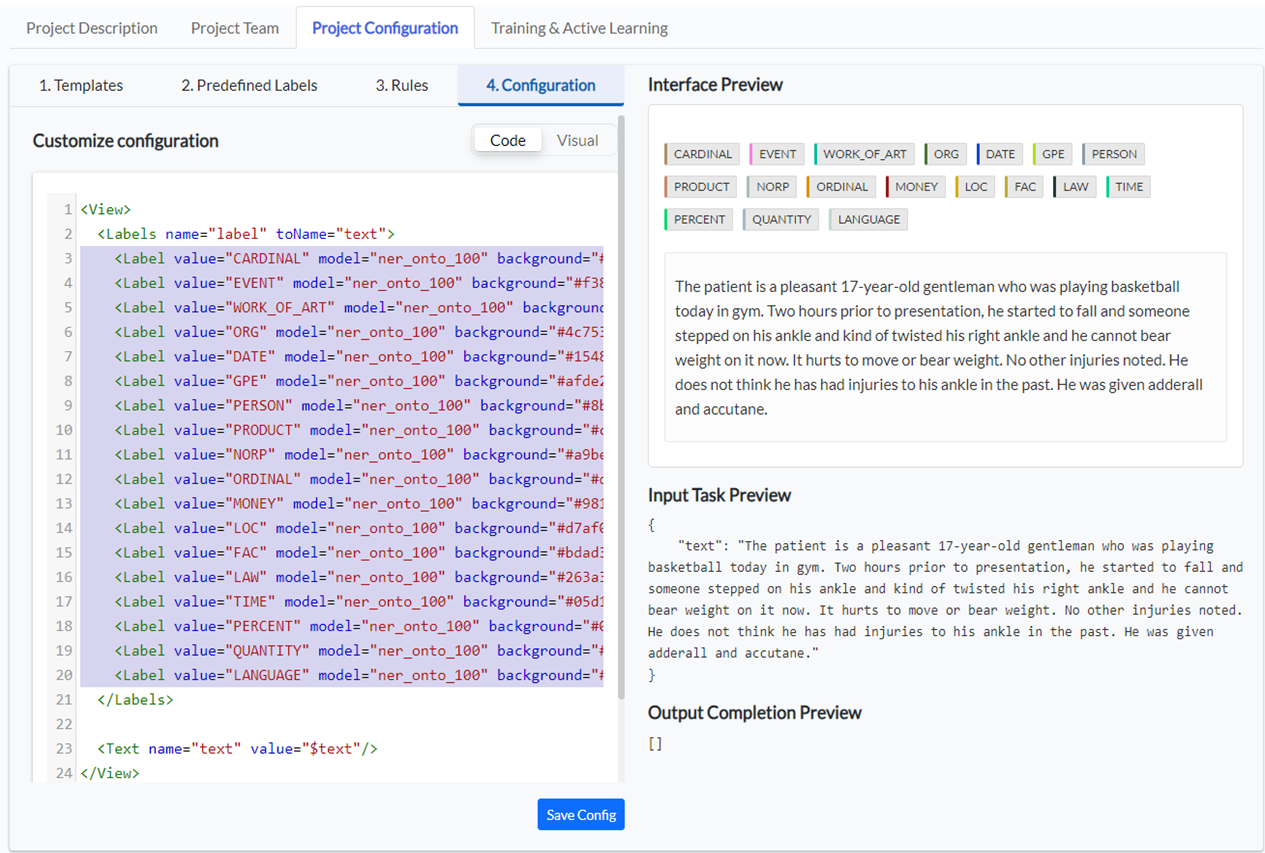
Go to the fourth tab – 4. Configuration and remove the labels that are not of interest to the current project. You can do this from both available views: Code and Visual.
In the Code view select all Label tags and delete them from the config file.
Now you can define custom labels you want to use in the current project. As we want to analyze food recipes, we’ll be interested in labels such as vegetable, fruit, meat, quantity, etc.
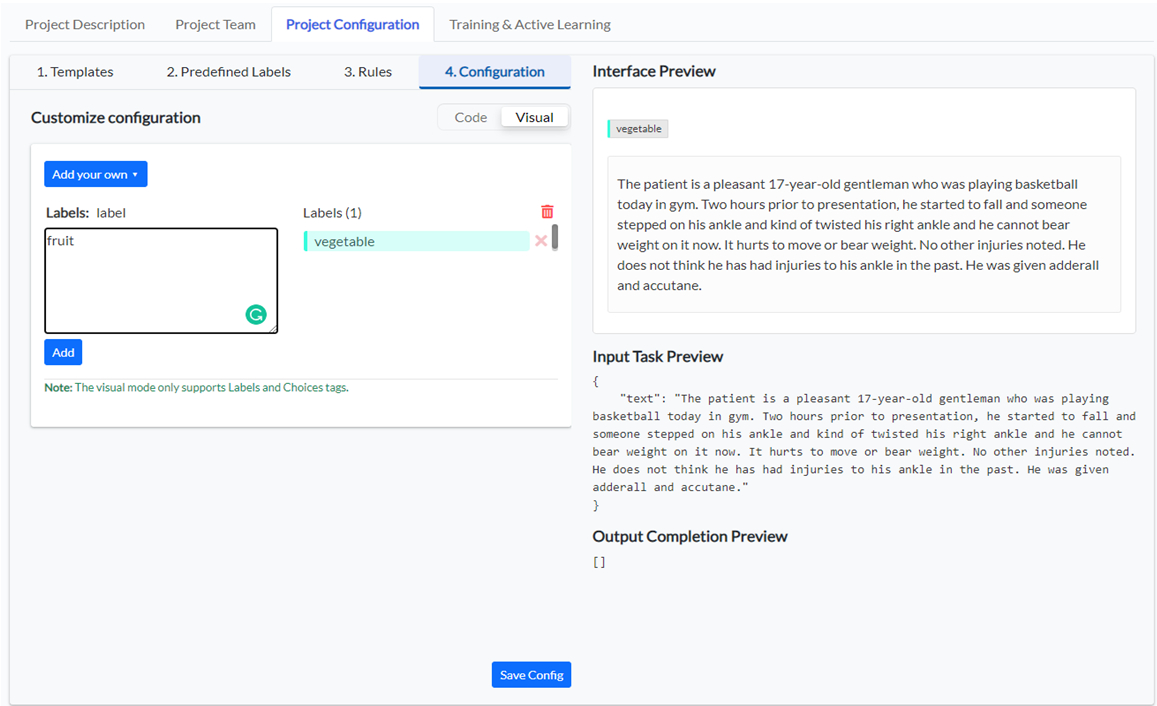
Switch to the visual view and start typing the name of the labels you want to add to your taxonomy, then click on the Add button. When you finish, click on Save Config button to persist your project configuration.
Use rules to preannotate
If you or someone else in your team/organization has defined rules for preannotation, those can be used in any project. All available rules are listed on the Project Configuration page, under tab 3.Rules. You can select all rules you want to add to your project configuration and click Add Rules button.
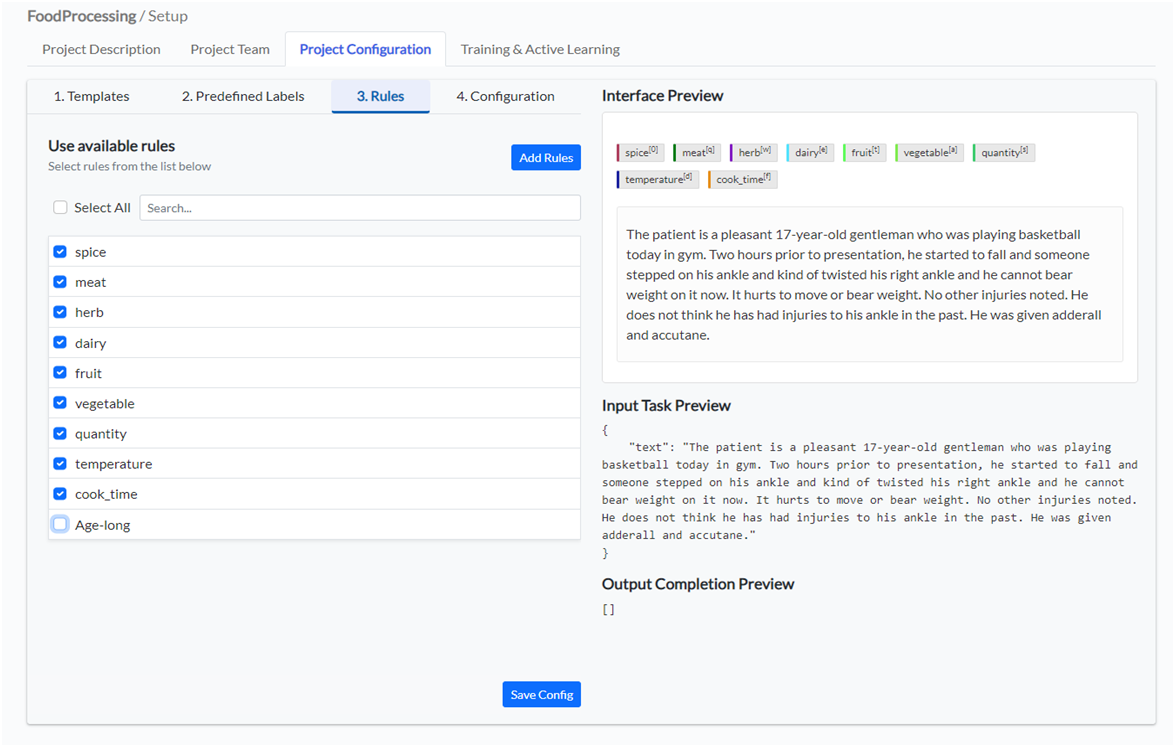
This will add new labels to your project configuration and link them with the rules with the same name. If you already added a spice label to the configuration via the visual or code view, adding the spice rule, will not duplicate the label but simply add the link between the existing label and the spice rule. In that way, the rules can be used to automatically annotate the corresponding labels within the documents to analyze.
        <View>

        <Labels name="label" toName="text">

        <Label value="spice" rule="spice" background="#af405f" />

        <Label value="meat" rule="meat" background="#027b16" />

        <Label value="herb" rule="herb" background="#831dc3" />

        <Label value="dairy" rule="dairy" background="#53e2fd"/>

        <Label value="fruit" rule="fruit" background="#60fb5c" />

        <Label value="vegetable" rule="vegetable" background="#80eb50" />

        <Label value="quantity" rule="quantity" background="#3ecb6f" />

        <Label value="temperature" rule="temperature" background="#1c239f" />

        <Label value="cook_time" rule="cook_time" background="#e68f1c "/>

        </Labels>

        <Text name="text" value="$text"/>

        </View>
You can now start importing tasks into your project and annotate them. However, manual text annotation is a difficult and time-consuming task. If you want to jump-start your annotation project you’ll certainly enjoy two of the automation features Annotation Lab offers in this direction:
- Use of Spark NLP for Healthcare rules. As explained in the first part of this tutorial, you can define and reuse rules for predicting the labels you are interested in.
- Use of pre-trained Spark NLP models. Similarly to rules, you can easily reuse any of the labels present in the pre-trained Spark NLP models published on the Models Hub as part of your project. You can do that from the Predefined Labels tab of the Project Configuration Simply choose the labels you want to reuse and add them to your configuration.
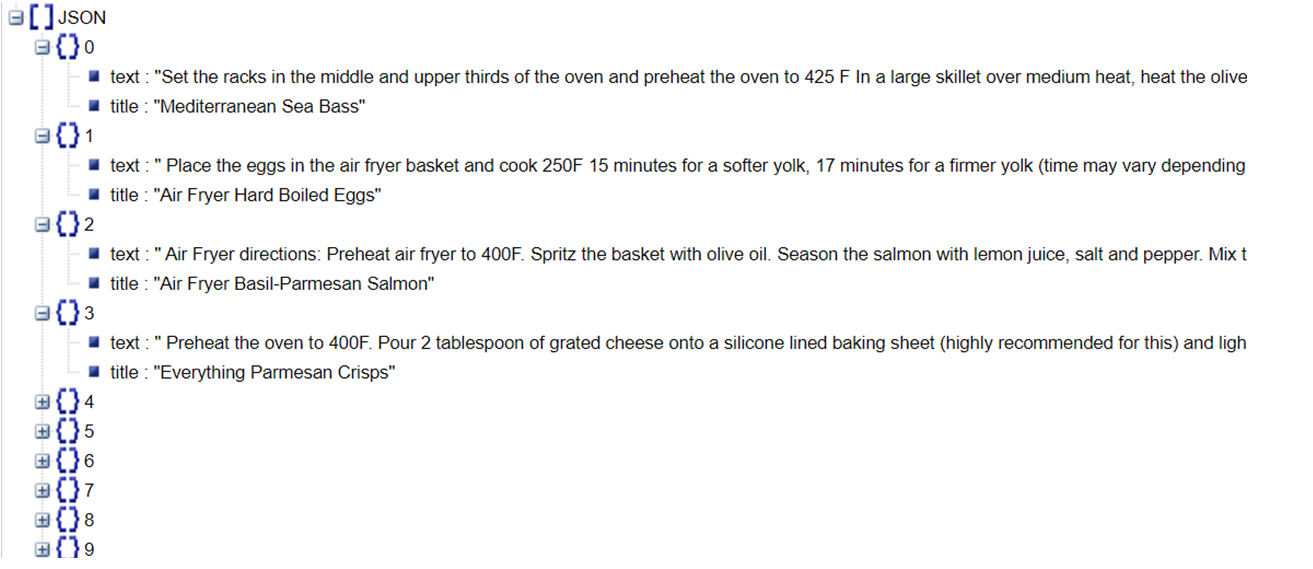
Import documents
For importing the test/train data into the annotation lab, I have generated a json file containing the content for the recipes and their titles (See train data). The structure of the json import file is very simple as you can see in the image below. This is also explained here.
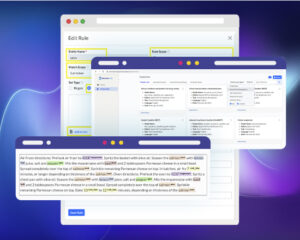
Once the tasks are imported, I select all tasks and run preannotation on them. The preannotation pipeline will use all rules added to the project configuration and offer predictions such as:
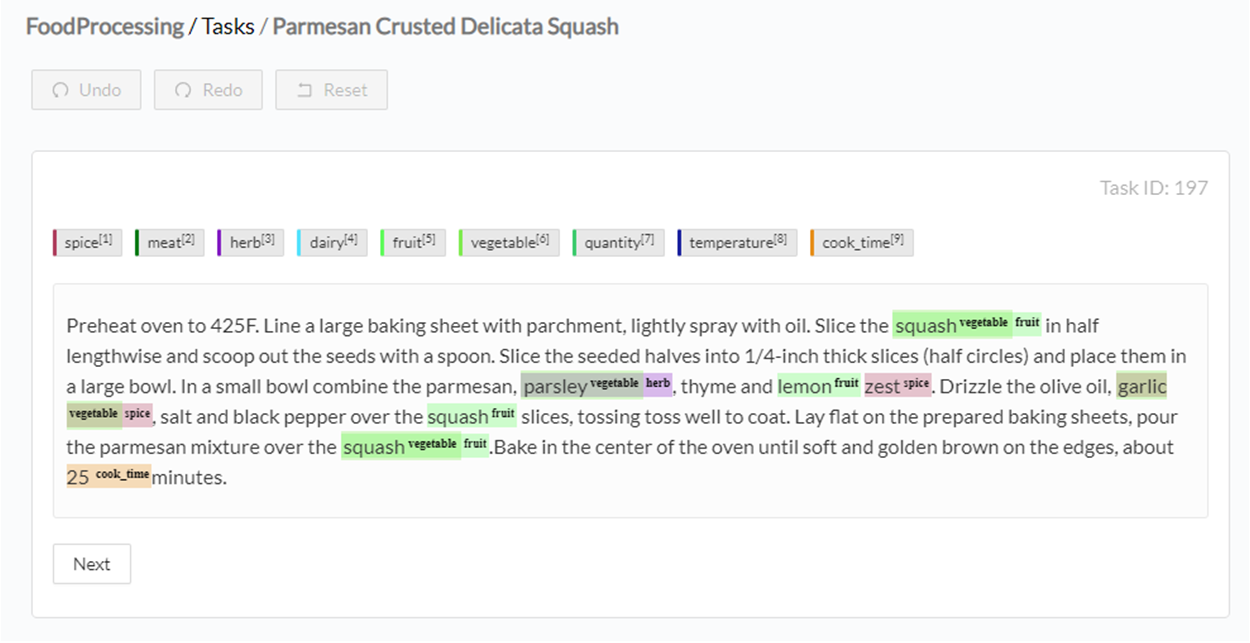
Now all I have to do is check if the labels are correct, and if not, correct them, then submit the annotation.
Annotation Process
For this example project, I have used a team of four annotators and a total of 200 sample documents. I have assigned a number of 50 tasks/annotators and preannotated all tasks using rules. The preannotation manual correction/validation took roughly 8 minutes per task -> less than one day of work for the team.
The process followed by the team was to clone the predictions generated using rules and correct them when necessary.
Start from predictions
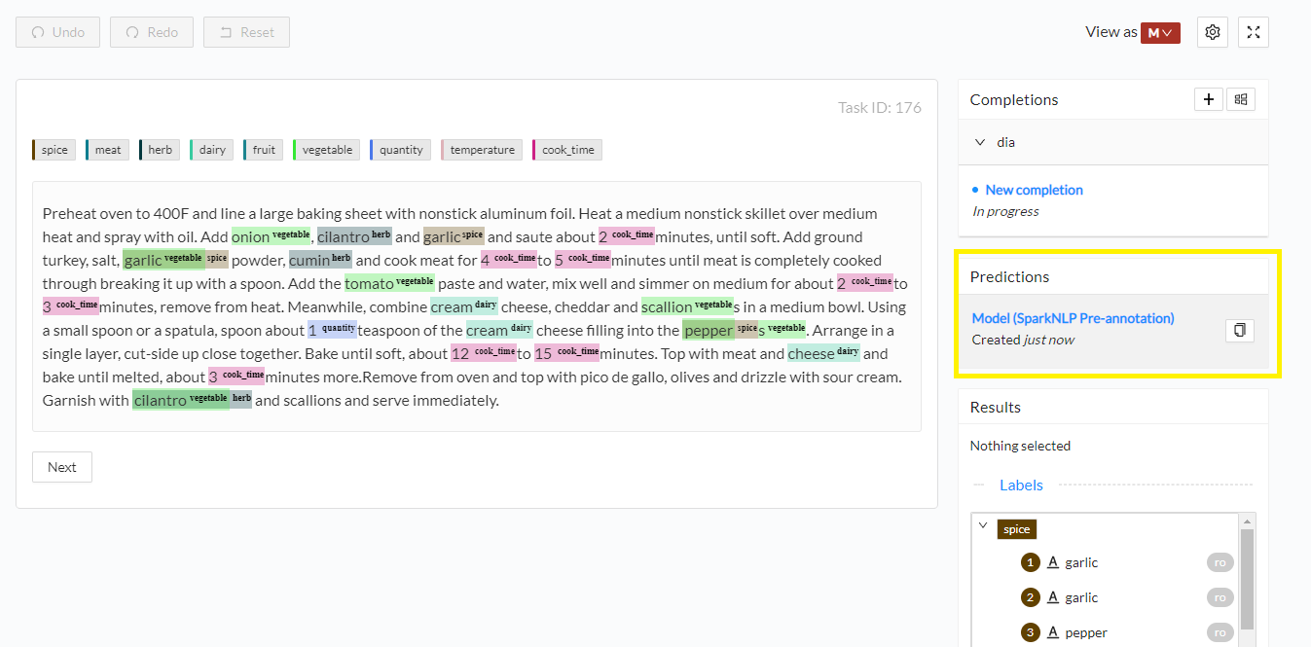
When clicking on one task from the Tasks page, Annotation Lab automatically displays the content of the most recent prediction, if any is available. You can notice some basic information about the prediction in the right panel: the source/name of the pipeline which was used to generate the predictions and the creation time. Predictions are not editable, but annotators can clone them into new completions. Such a completion contains the same annotations as the source predictions and is editable.
Create completions
You can create a completion from scratch or clone a prediction. Once that is done, an annotator goes through the annotations and edits them if necessary. Several actions are available:
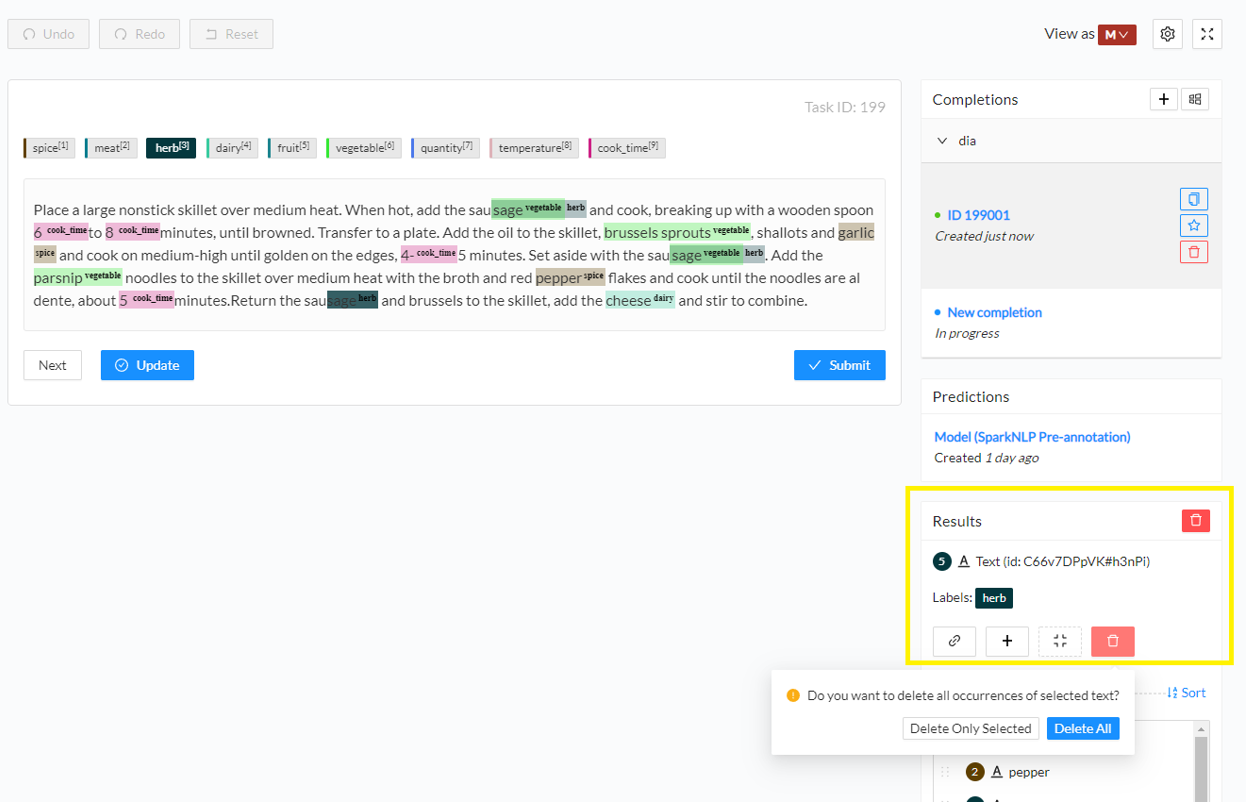
- Remove an annotation. Click on the annotated chunk and from the right-side Results panel click the recycle bin icon. If the exact same annotation is present in the current task several times, a popup box will ask if you want all occurrences to be removed or just the current one. In this example, I want to remove all annotations for sage chunk as herb as they are not correct.
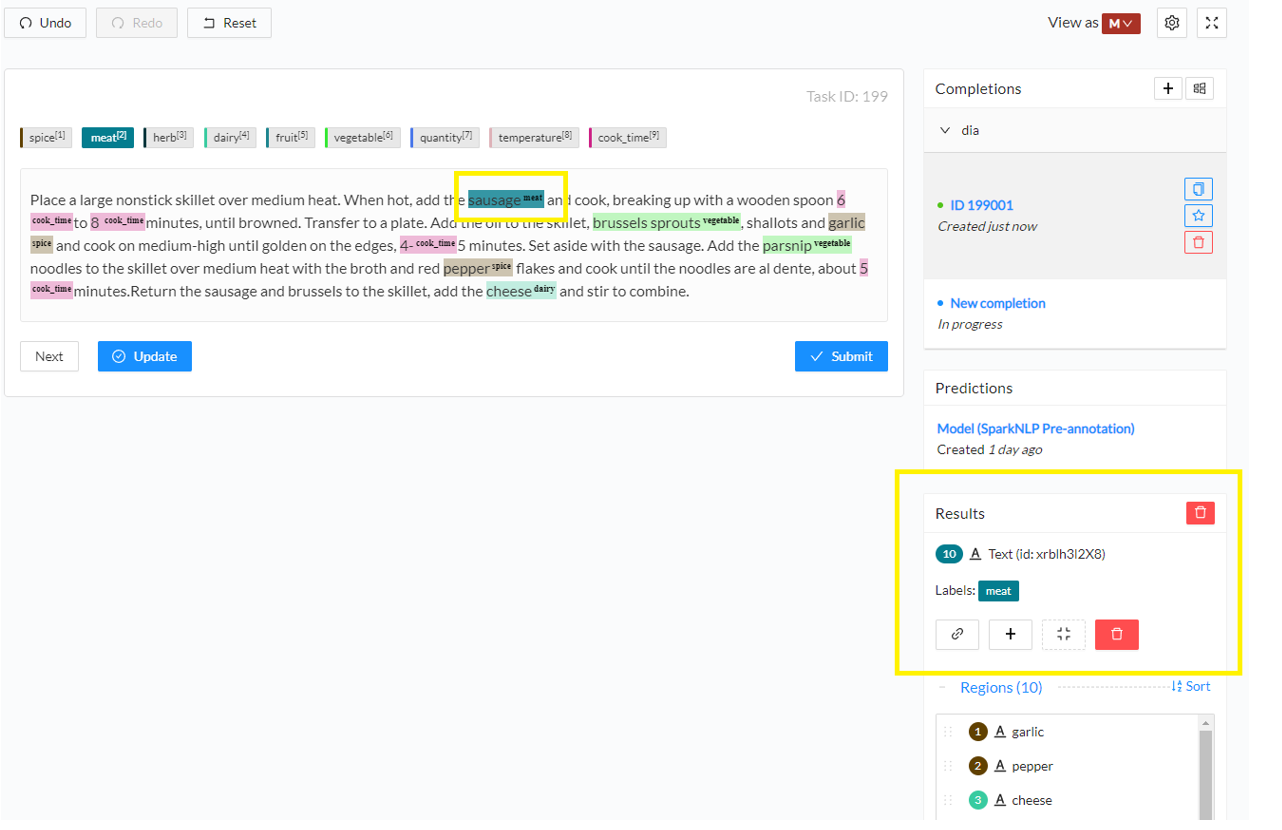
- Add a new annotation. Click on the label you want to use or press the corresponding shortcut key and then select the text you want to annotate. This will create a new annotation for the selected chunk with the selected label. You can see the annotation on the Results panel in the right side of the screen.

During the annotation process, you can save your draft completion and update it as many times as necessary. Once the annotation is complete, click on the Submit button to finalize it. This will lock the completion and star it. A locked completion is no longer editable, however, it can be cloned if further changes/updates are needed. You can have as many completions as needed for a given task, but only one starred completion which is considered the final version. The starred completion is taken into account for reviews and for model training.
What’s next?
I illustrated in this post all steps for putting together an annotation project, importing task, speeding annotation with rules, correcting predictions, and creating new annotations. Once a sufficient number of tasks are completed, you can proceed to train a new model. This process will be detailed in a follow-up blog post.