


Recently, a market research company was conducting a study on customer satisfaction in the travel industry. They had a vast amount of data to analyze, including travel reviews from TripAdvisor. However, they faced a significant challenge – how to extract the relevant entities such as names of places, restaurants, hotels, shops, products, or services mentioned in the reviews efficiently.
After thorough research of an annotation tool for text content, they chose NLP Lab, because of its out-of-the-box pre-annotation features that allow automatic annotation of travel reviews with entities, relations, or sentiment tags. The starting point of their analysis was the TripAdvisor reviews dataset they gathered for the project. A very similar dataset can be downloaded here.
The aim is to extract entities mentioned in the reviews, such as hotel names, tourist attractions, and transportation options. With the NLP Lab’s powerful entity extraction capabilities, the customer was able to label and extract the relevant entities within a matter of hours, instead of days. Furthermore, NLP Lab produced, besides annotated data, a DL model tuned for the specific type of content, allowing automatic pre-annotation of new and unseen content.
In this series of blog posts, I will illustrate the concrete steps to follow for running such a data annotation project, in view of identifying and extracting entities from textual reviews. Overall, the workflow covers the creation of a NER project, preparation of some high-quality training data (annotated hotel reviews), tuning or training of a model, and then deployment of the model in production environment https://www.kaggle.com/datasets/rajnathpatel/ner-data
Project setup
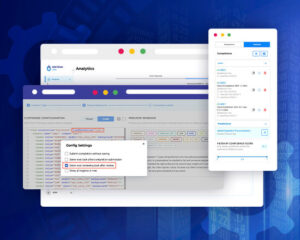
NLP Lab (documentation here) offers all necessary features out-of-the-box via an intuitive and simple UI. Using the annotated data from NLP Lab, you can train a model without writing a single line of code, everything is merely a few clicks away.
Here is how you can get started with creating your own NLP Lab project:
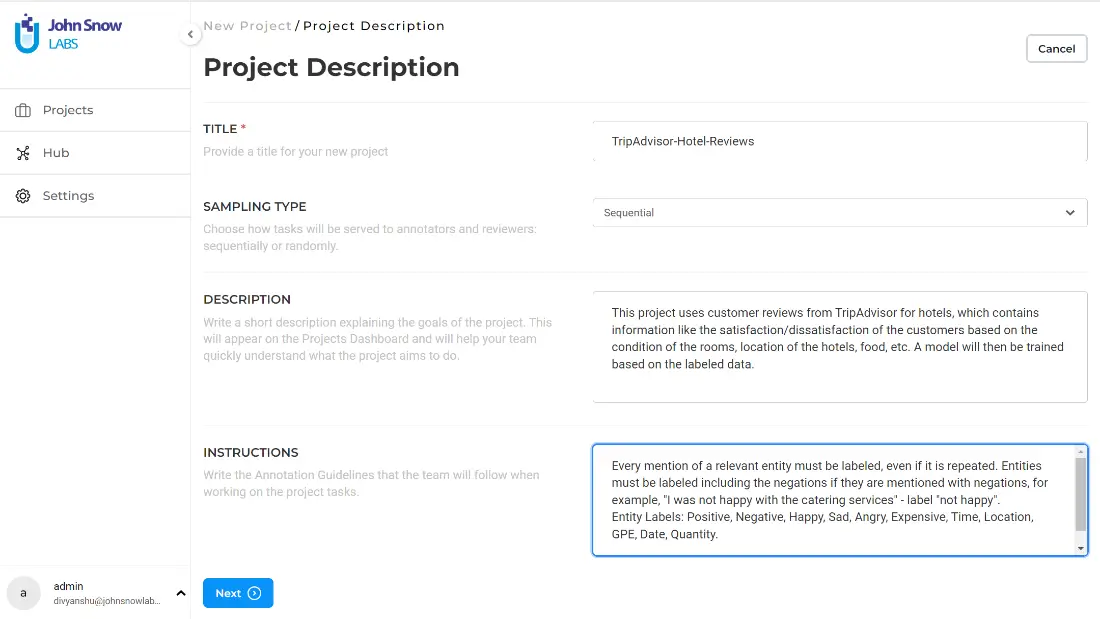
1. Project Creation
The first step is to create a project specific to the problem you want to address (e.g., the type of documents you need to analyze and the taxonomy you target). After signing in into NLP Lab, on the upper right side of the dashboard users see an option to create a new project.
When clicking on this button, a new page appears where some details about the project must be specified:
- Title: This will be displayed as the name of the project.
- Sampling Type: This option refers to task serving on annotation mode. It offers two options – Random and Sequential. Random sampling will serve you the tasks randomly, whereas, in sequential sampling, the tasks are served in a serial order.
- Description: A short description highlighting the main aim of the project.
- Instructions: Annotation guidelines for the project for your team members. Those should be as detailed as possible to ensure consistency of annotations across the team.
2. Team Definition
The next step redirects users to the Teams page. Here users can add annotators, reviewers and/or managers to the project team. Those users will gain access to the tasks assigned to them and will be able to annotate and/or review those tasks. This step is skipped here since team members can be added and removed anytime. You can read more about this here (https://nlp.johnsnowlabs.com/docs/en/alab/project_creation#adding-team-members).
3. Project Configuration
Clicking” Next” will take you to the Project Configuration page, where you can specify the type of content you want to annotate, the taxonomy you want to use, and the models, rules and prompts you want to plugin for preannotations.
The configuration page is divided into three tabs. The first tab is the Content-Type, and shows two important options:
- Choose Content Type – This feature showcases the various types of data that you can annotate with NLP Lab, ranging from plain text to PDFs, images, audio files, and even HTML data. With such a flexible range of options, NLP Lab allows you to work with diverse data types over a wide range of applications, from analyzing customer feedback to processing research papers, scanned invoices, radiological images, videos and more.
- Choose Template – This provides you with a range of pre-defined templates for different NLP tasks. These templates include for instance elements of classification, named entity recognition or text summarization; they are a way to illustrate by example how to define a taxonomy and allow fast experiments. By selecting a template, you can quickly set up your NLP project and begin annotating your data with a pre-defined set of labels. This saves time and streamlines the process of setting up an NLP project, making it more accessible to users with varying levels of expertise in NLP.

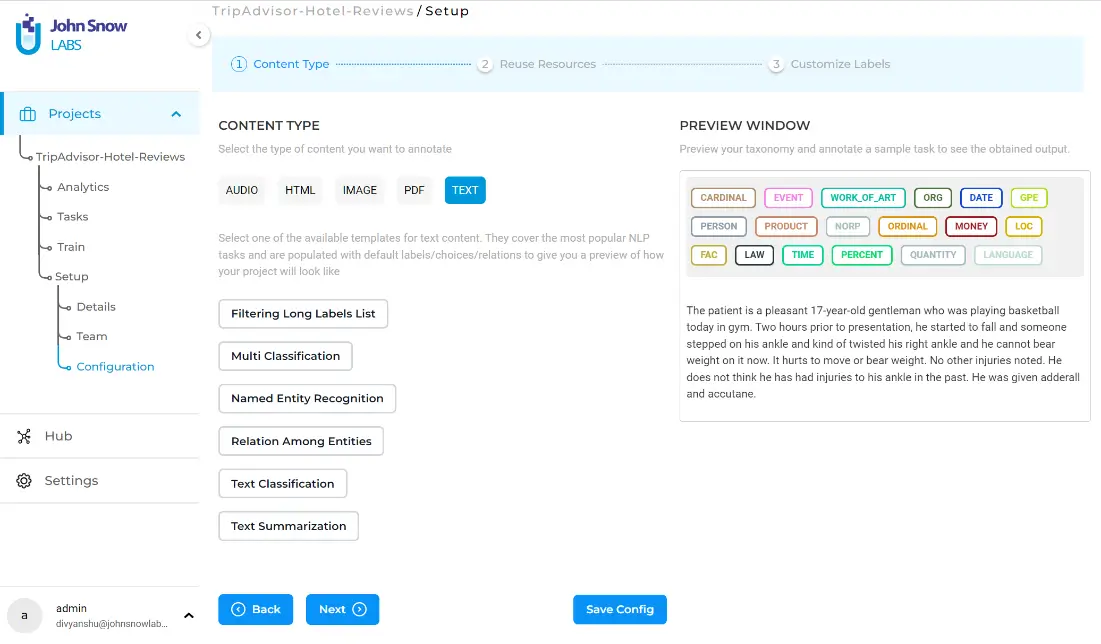
On the right panel, you will see a preview window which serves as a playground where you can test your labels on a sample text. Simply click on a label and drag the mouse cursor across the word you wish to label.
For a project, it is important to know what entities are to be extracted, and the extraction must be based on clear annotation guidelines. You can mention these instructions while creating the project and update them as often as necessary to reflect teams’ annotation agreements. For the current NER project, the following entities are targeted:
- PERSON – Used to identify the names of people mentioned in the reviews, such as the names of hotel staff or other travel companions.
- AGE – All references of age encountered in the text. Numbers must be extracted along with the expressions such as “years-old”, “y/o”, “age of”, “months-old”, etc.
- TIME – Extract all the time references from the text. The numbers should be extracted along with expressions such as “AM”, “PM”, “o’ clock”.
- DATE – This label is used to identify all the date entities. This label is imported from the rules, and it is based on a well-defined regular expression which can support multiple formats for dates. For example, “20.04.2023”, “04.20.2023”, “04-20-2023″, etc.
- QUANTITY – This label must be used whenever objects are mentioned with respect to their quantity. The object should also be extracted along with the number.
- HOTEL – Name of hotels mentioned in the reviews.
- GPE – Geopolitical entity like names of cities, countries, etc.
- FACILITY – This label must be assigned to the amenities provided by the hotel. For example, “the complimentary spa was very relaxing…” contains “complimentary spa” which is a facility provided by the hotel.
- SATISFIED – This label is to identify whether the customer was happy with the services or products of the hotel. DISAPPOINTED – To be used as label if the customer was not happy with the services of the hotel. This includes expressions resembling “not up to the standards”, “something or the other was not functioning”, etc.
- ANGRY – This label must be used when the review seems to be critical. This includes expressions resembling, “do not book this hotel at any cost”, “the room was not what I had booked”, etc.
- EXPENSIVE – This label should be used to identify mentions of high prices or luxury amenities in the reviews. This includes expressions resembling, “Though the room was costly”, “The hotel had an expensive spa”.
- CHEAP – This label should be used to identify mentions of low prices or budget amenities in the reviews. This includes expressions resembling “The hotel served free breakfast”, “The room was cheaper than I thought”.
- SERVICE – This label should be used to identify certain services provided by the hotel. For example, free breakfast, tour guide for the city, etc. This label should be imported as a rule which is based on words which are associated to a sentiment.
- PRODUCT – This label should be used to identify certain products provided by the hotel. For example, shampoo, face wash, clean towels, etc. This should also be imported as a rule which contains general names of products to match with. Any occurrence with words – say shampoo – will be labeled as PRODUCT.
Labels such as SATISFIED, ANGRY, DISAPPOINTED, EXPENSIVE, and CHEAP are usually used for classification tasks. They must be used carefully. The sentiments must be linked to some services or products. One way is to make relations between the sentiments and the services. Another way is to add rules for sentiments and designate some words associated with that sentiment. This will be covered in detail in the next part of the blog. After choosing the content type and template, click on the “Next” button to navigate to “Reuse Resources” tab which allows you to reuse labels from already available models, rules, and prompts. You can discover existing resources via the search box, based on either the name of the label or the name of the model. In this project, I will mix labels linked to models, rules and prompts. The model I chose (NER_ONTO_100) contains many pre-defined labels that can be used for annotating entities in our project, such as, DATE, PERSON, GPE, CARDINAL, QUANTITY, etc.
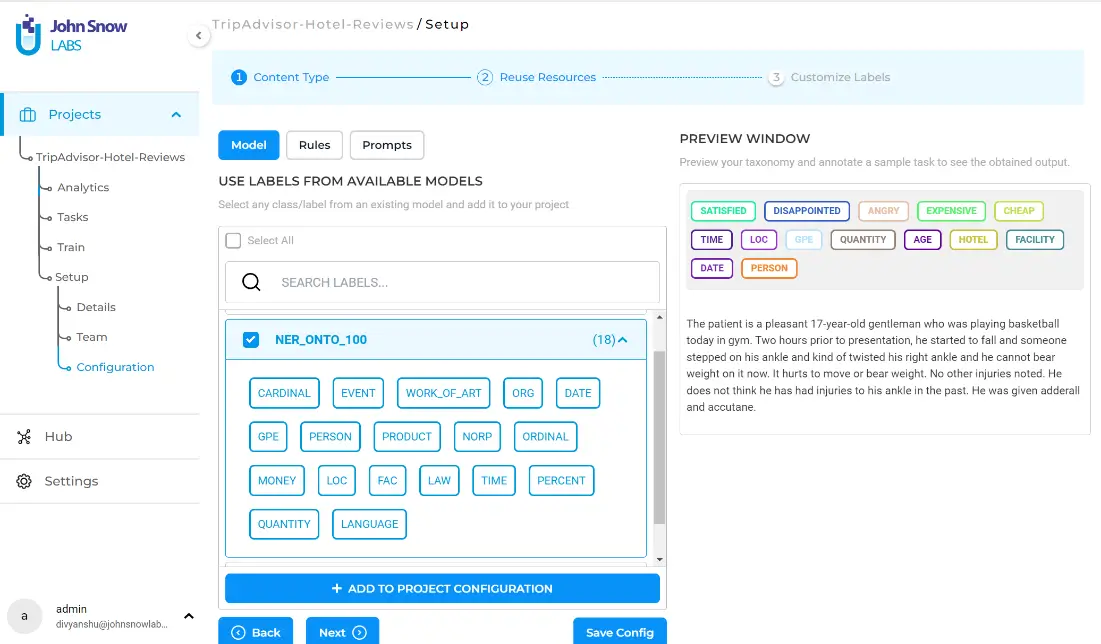
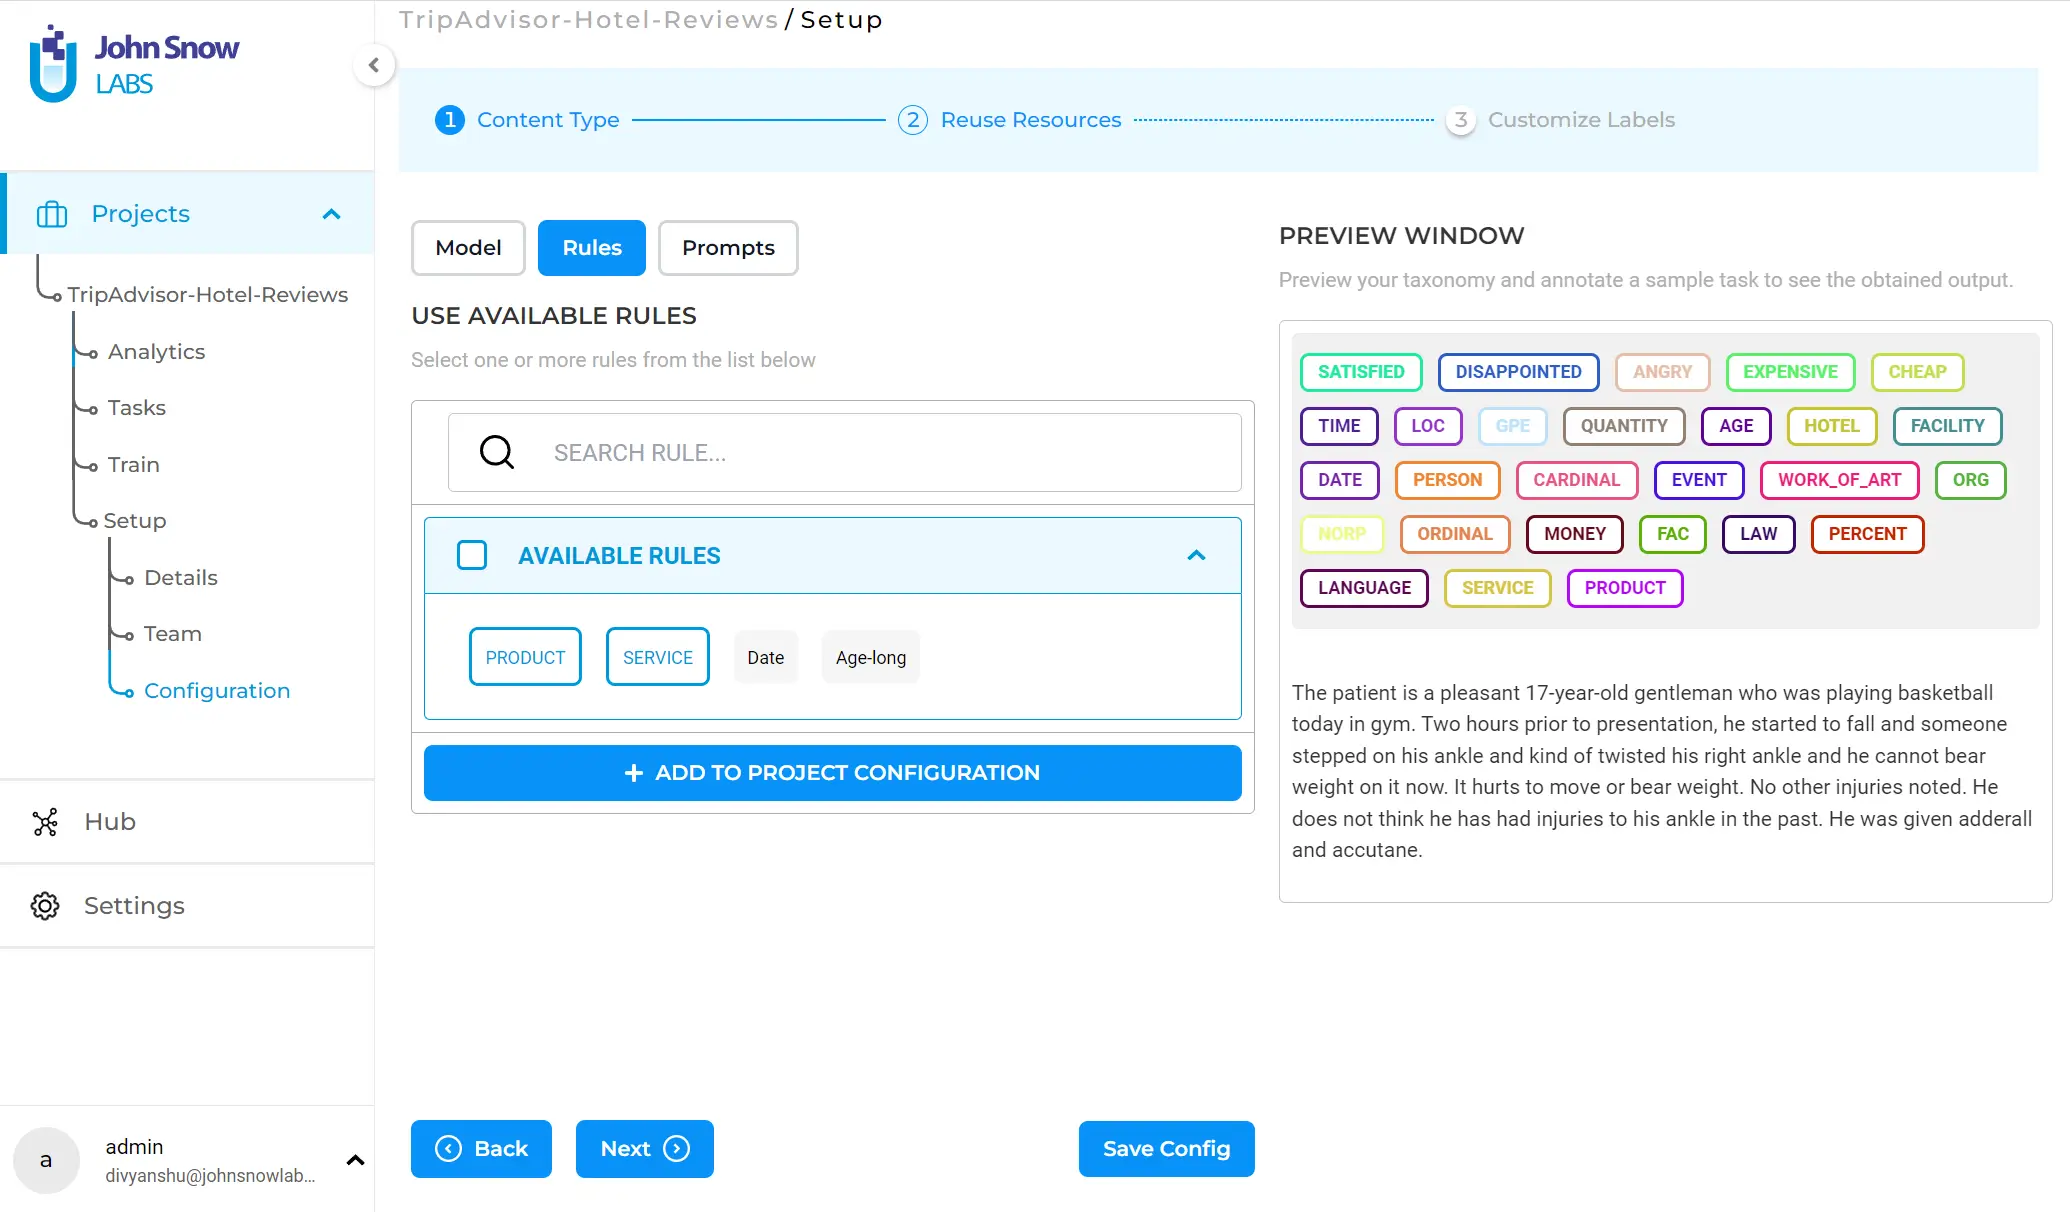
You can select one or several labels from the listed models, rules, or prompts and click” ADD TO PROJECT CONFIGURATION”. Note that this is an optional step, in case you have pre-trained models overlapping the entities targeted by the current project. Here, I also add rules that will help link the sentiments to a service or a product. As explained above, any occurrence of words indicating a service, such as ‘tour desk’ or ‘parking’, will be labeled as ‘SERVICE’. The same goes for the label ‘PRODUCT’.
The final step is the” Customize Labels” tab, which allows the fine-tuning of the configuration and the addition of custom labels, choices, or relations.
Here, you can add or remove labels from the taxonomy. This can be done in two ways:
- Via the visual component where you can click on ”ADD NEW LABEL” and insert the new label. Likewise, if you want to remove a label, you can do so by clicking on the cross next to the respective label.

- Using the code view where you can add a label using a <Label/> tag. The ”value” parameter specifies the name of the label while the other optional parameter, ’background’, assigns the color to the label based on the hex code of the color. You can see that the labels created from available model (view model) have parameter “model” assigned, the value of which is the name of the model.


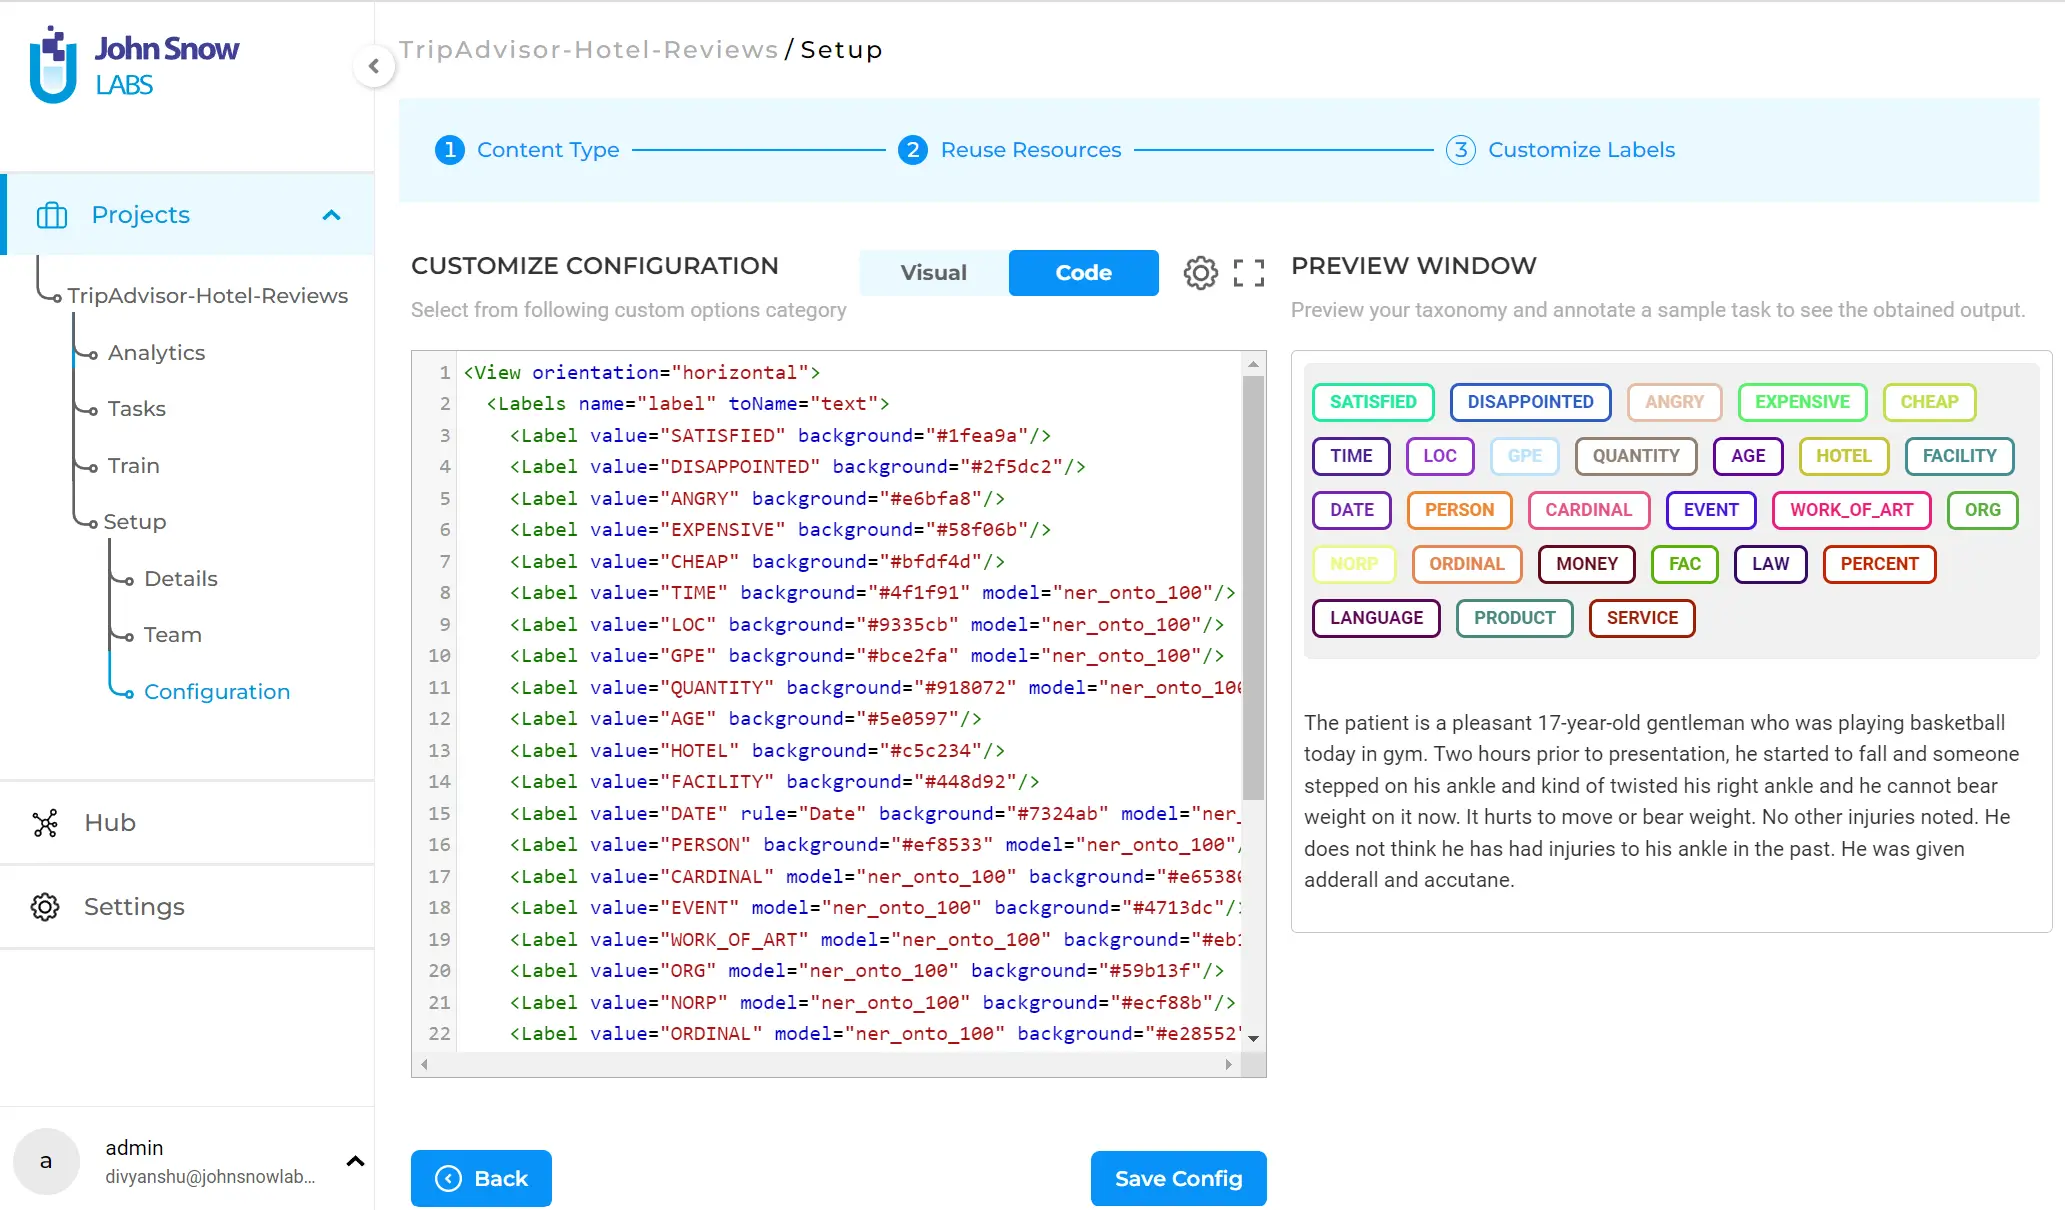
Clicking ”Save Config” will save your configuration.
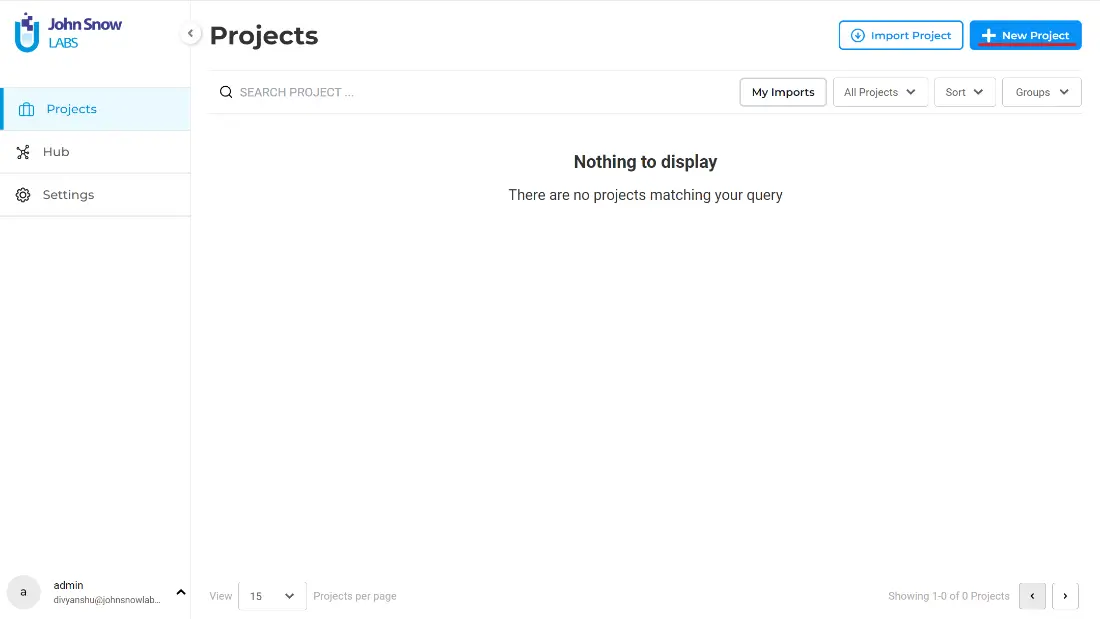
4. Import Data and Start Annotating
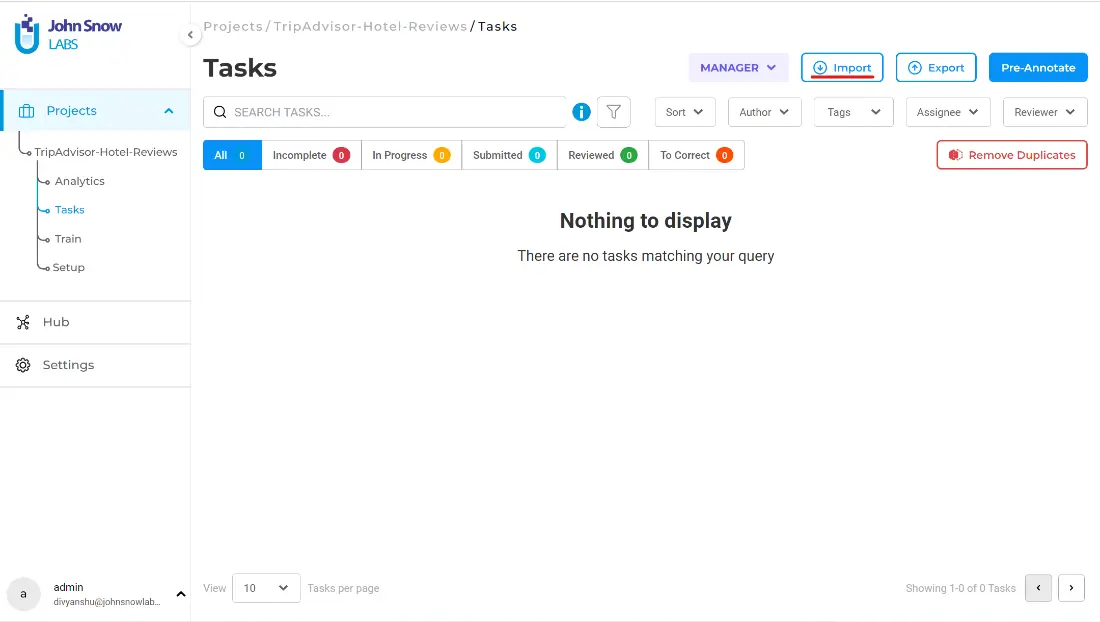
Your project setup is now complete. You are ready to import the data. You can navigate to “Tasks” from the left menu and click on “Import”.
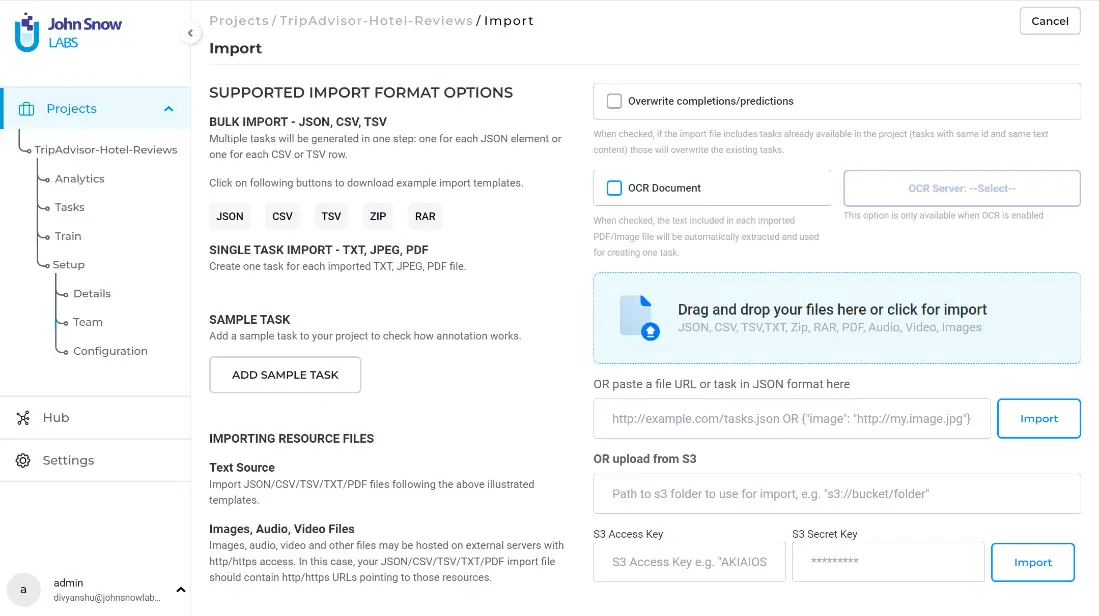
On the import page, you will see many available import options. On the left side, you can see what type of files the project supports – JSON, CSV, TSV, ZIP, and RAR. To import the tasks, you can either drag and drop your file or browse through the file browser and select the file you want to import. The other way to import the file if you do not have it stored in the local machine is to insert the URL path of the file, or if it is stored in S3 bucket, use the path to the bucket folder. In this project, we will import data pertaining to hotel reviews that contains information such as name of the hotel, facilities provided, how expensive or cheap the rooms were, etc. The initial data consisted of separate columns for positive reviews and negative reviews. I concatenated the two columns in a separate dataframe, and imported it to the project. An important thing to notice is that while importing the data, the column name (if it is a csv file) or the key (if it is a JSON file) should be” text”.
Once the tasks are imported, a popup will appear upon successful import. You can click on ”Explore Tasks”, to view all the tasks on the tasks page, as shown below.
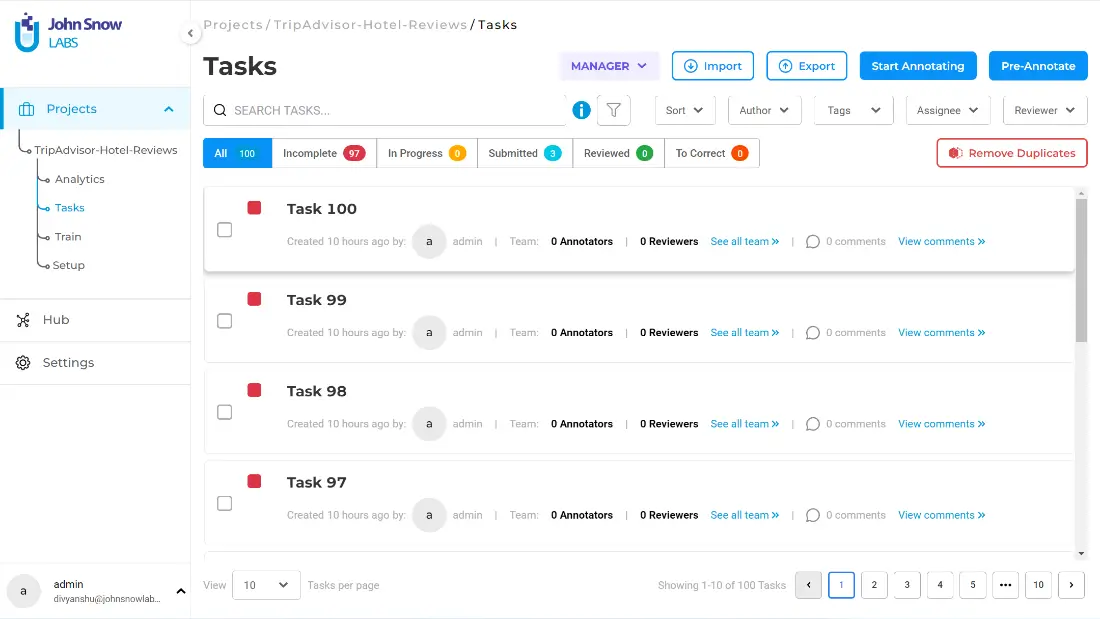
The tasks page shows tasks marked in red which means that they are incomplete. As you progress through the annotation of the tasks, they would jump from one status to the other:
Incomplete (red) -> In Progress (yellow) -> Submitted (Cyan) -> Reviewed (Green) -> To Correct (Orange). You can sort the tasks in either ascending order of their serial number, or descending order. Similarly, NLP Lab offers a range of features that allow you to easily manage and monitor your tasks. By using the “Author” filter, you can quickly locate the tasks created by a specific user. Additionally, you can utilize the “Tags” filter to assign custom tags to specific tasks. For instance, if you come across a task that requires corrections, you can easily tag it with “Corrections Needed” for other users to identify and address. These convenient features help streamline task management and improve collaboration among team members.
You are now ready to annotate the tasks. You can either click on a task or click on “Start Annotating” on the top right side of the page. As an example, let us have a look at Task 99.
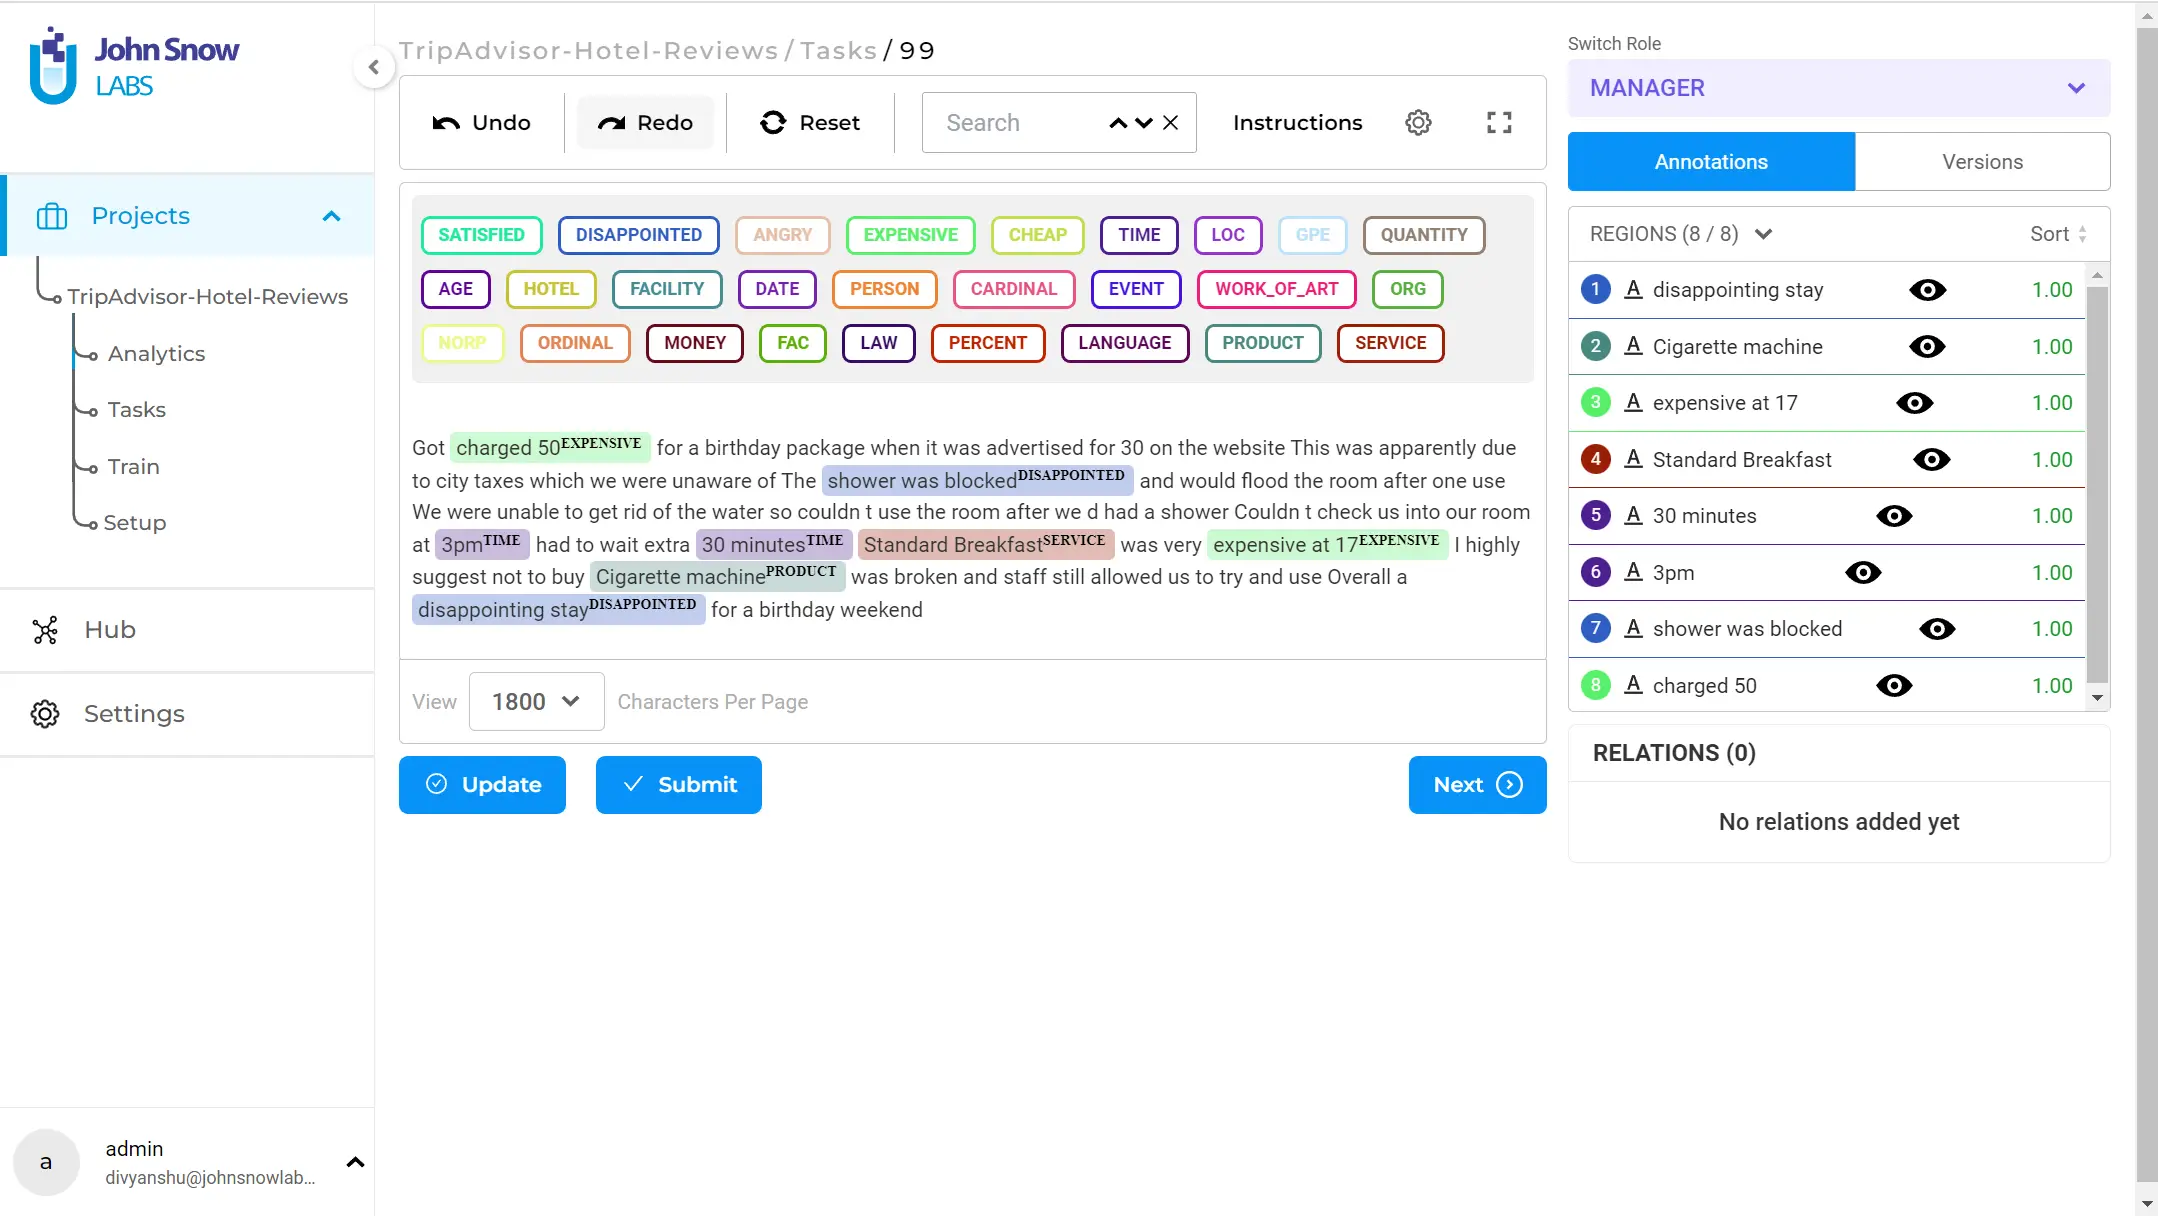
You can label the entities by clicking on the label and then dragging the cursor across the entity(entities). The image above shows how the labeled entities would look like. Once the annotation is complete, click on” Save”, and then” Submit”. When a task is submitted, it can be viewed under the ”Submitted” status on the tasks page.
In this tutorial, we have learned how to create a project using NLP Lab, configure our labels, and import the tasks (data) in our project. Furthermore, we have also labeled our first task. In the next part of the tutorial, we will learn how to perform manual text annotation, automatic pre-annotation, go through the workflow of preparing the training data, and export the annotated data.
Getting Started is Easy
The NLP Lab is a free text annotation tool that can be deployed in a couple of clicks on the AWS and Azure Marketplaces, or installed on-premise with a one-line Kubernetes script. Get started here: https://nlp.johnsnowlabs.com/docs/en/alab/install