


In this guide, we will navigate the process of subscribing to John Snow Labs NLP libraries through the AWS Marketplace and establishing a dedicated server for document processing. This comprehensive, step-by-step walkthrough will facilitate the prompt installation of the necessary libraries and the configuration of a server tailored to your requirements.
John Snow Labs presently offers two PAYG product bundles: Healthcare NLP here and Finance and Legal NLP here. The products include domain-specific packages of Python NLP libraries, that allow quick and easy text annotation with pre-trained DL models, rules, and prompts but also NLP model testing, training, and tuning. There is no limit on the number of documents, models, or pipelines that can be used with those subscriptions: the software is licensed on a per-usage basis.
Please select the bundle that aligns with your specific area of interest. While this guide primarily demonstrates the subscription process for the Healthcare NLP, the same methodology applies equally to the Finance and Legal NLP.
Step 1: Access the AWS Marketplace and locate the John Snow Labs product
- Go to the AWS Marketplace: https://aws.amazon.com/marketplace/
- Search for “John Snow Labs – Healthcare NLP” in the search bar.
- Click on the product page for John Snow Labs – Healthcare NLP.

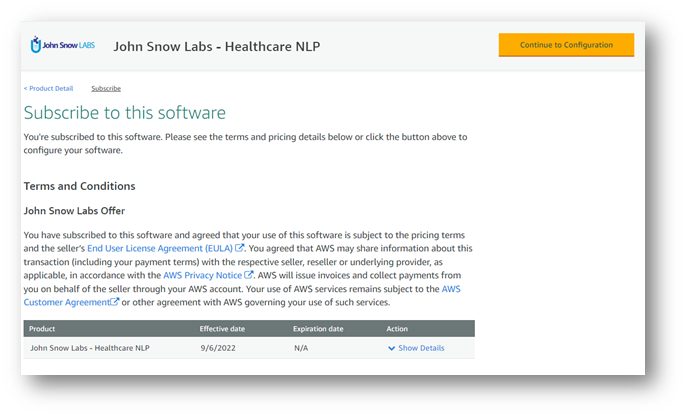
Step 2: Subscribe to the John Snow Labs – Healthcare NLP
- Click on the “Continue to Subscribe” button.
- Carefully read through the terms and conditions.
- If you agree with the terms, click on the “Accept Terms” button.
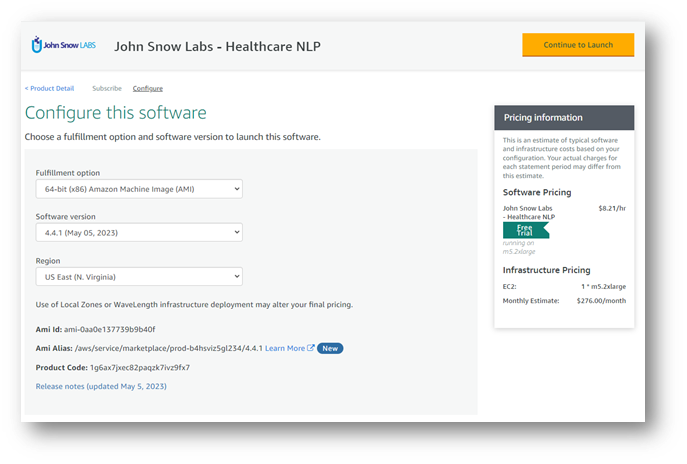
Step 3: Configure the John Snow Labs – Healthcare NLP
- Wait for the subscription process to complete.
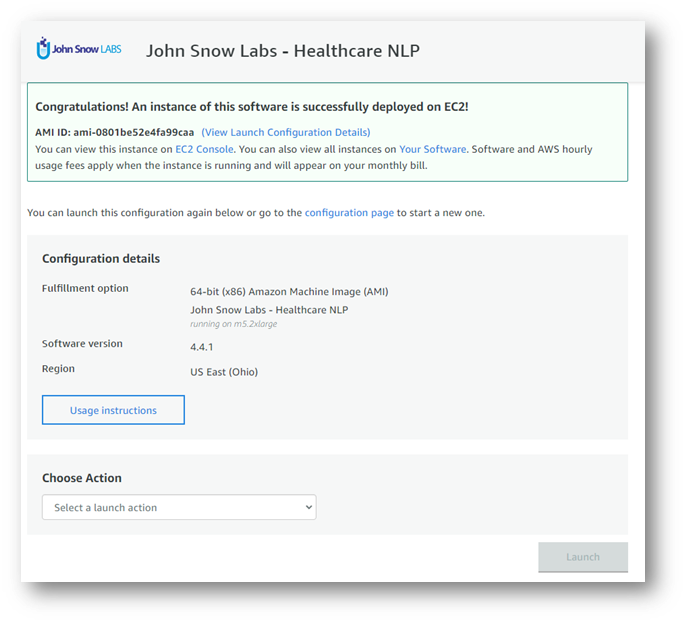
- Once the subscription is created, click on “Continue to Configuration.”

- Choose the desired configuration details, such as the version of the libraries or the region where you want to create the server. The latest version of the software will be selected by default.
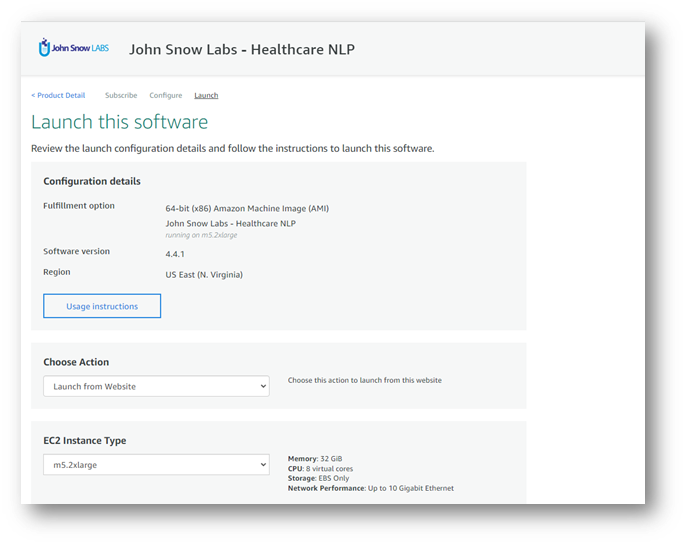
Step 4: Launch the Instance
- Click on the “Continue to Launch” button.
- Select the type of instance you want to use for deploying your application.
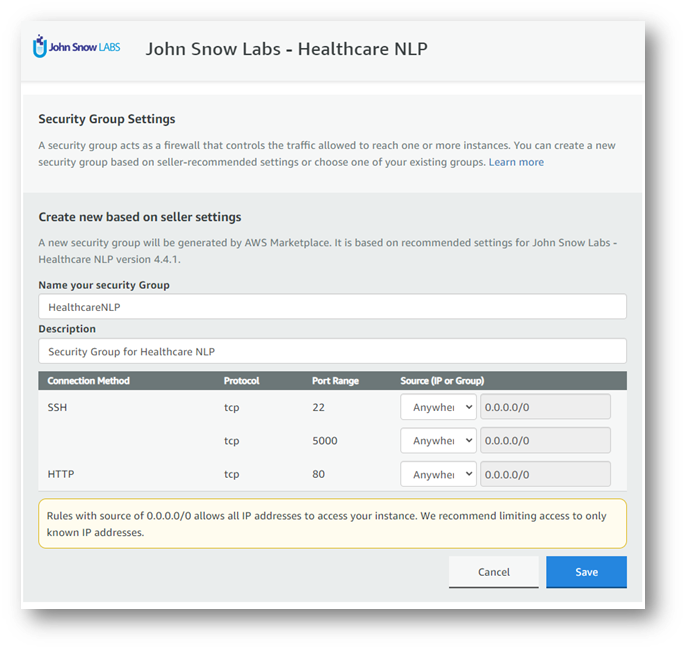
- Create a new Security Group based on Seller Settings by specifying a name and description for it. This will ensure that port 5000 is open for JupyterLab access, and port 80 is available via HTTP for accessing the product’s welcome page. Click the save button.
- Then click on the “Launch” button.
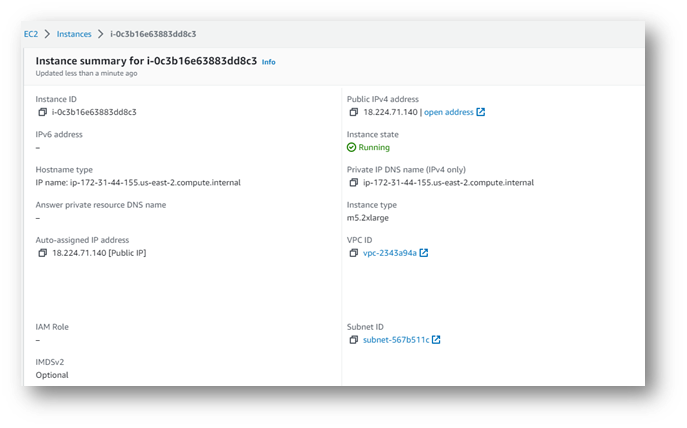
Step 5: Monitor the EC2 Instance
- After launching, you will see the new EC2 instance in the EC2 console.

- The instance will be in the “Pending” state initially.
- Click on the instance ID to view the details of the machine.
Step 6: Access the Product’s Welcome Page and JupyterLab
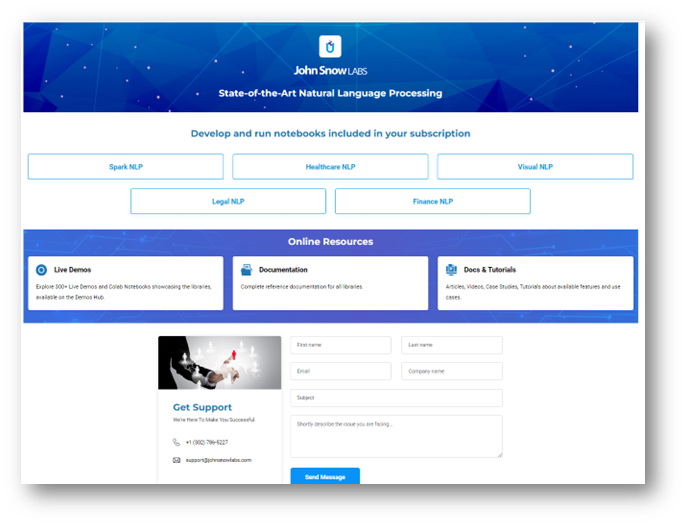
- The product’s welcome page is accessible via HTTP on the IP address of the machine.

John Snow Labs Healthcare NLP Landing Page
- Access the ready-to-run Jupyter notebooks for each included library by clicking on the corresponding button (e.g., Healthcare NLP).
- You will be redirected to JupyterLab.
- The password for accessing JupyterLab is the instance ID.

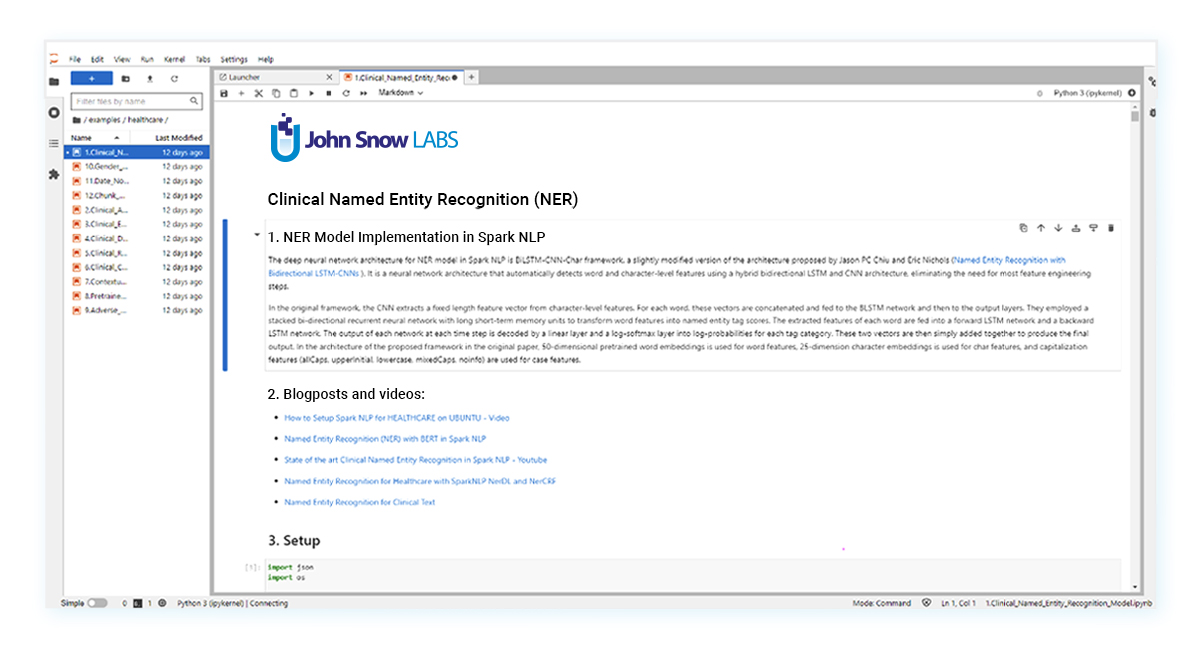
Step 7: Explore the Included Notebooks
- In JupyterLab, you will see the ready-to-use notebooks included in the product.
- Click on one of the notebooks to start experimenting with the NLP libraries.
Through this guide, you have acquired the knowledge to subscribe to John Snow Labs – Healthcare NLP libraries via the AWS Marketplace and to configure an operational server for document processing within a matter of minutes. You are now ready to start experimenting and harness the power of the NLP libraries offered by John Snow Labs.